Masthead header

New Roof, New Dormer

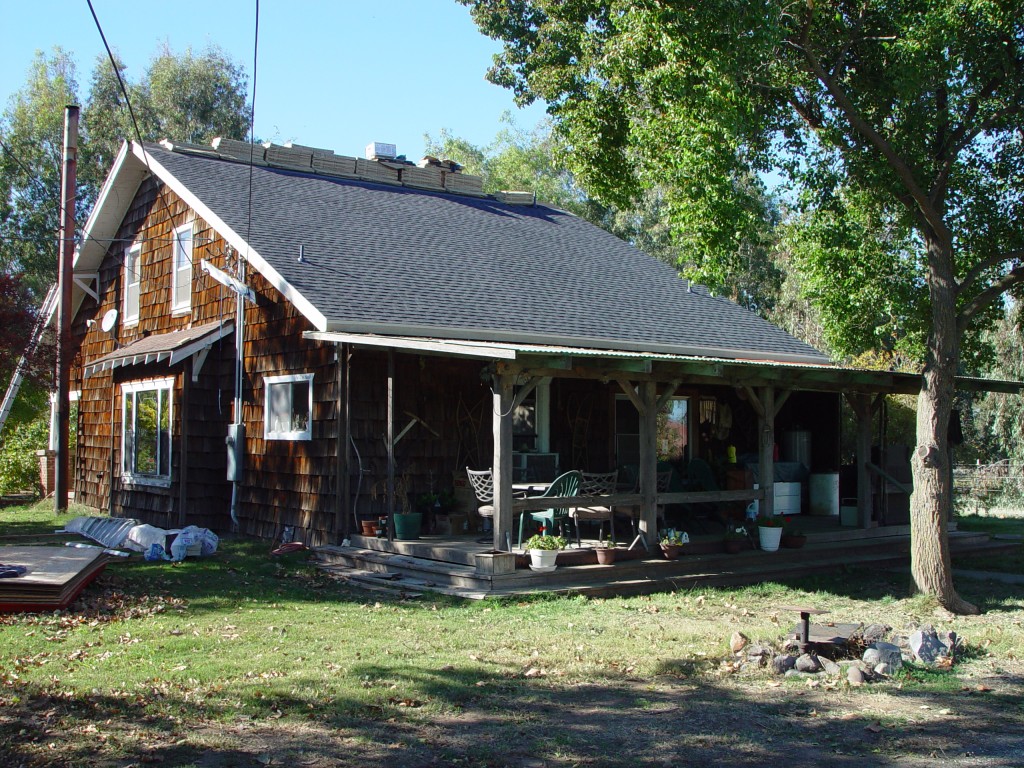
We both have a fascination for the American Craftsman style homes (a.k.a Arts and Crafts), to include mission style furniture, which was popularly associated with the American Arts and Crafts movement. Segue go! Not only do we enjoy the television show Grimm, but the American Craftsman architecture found throughout the homes. Segue done! It just so happens that the homestead at the Lazy B is considered a craftsman style bungalow.

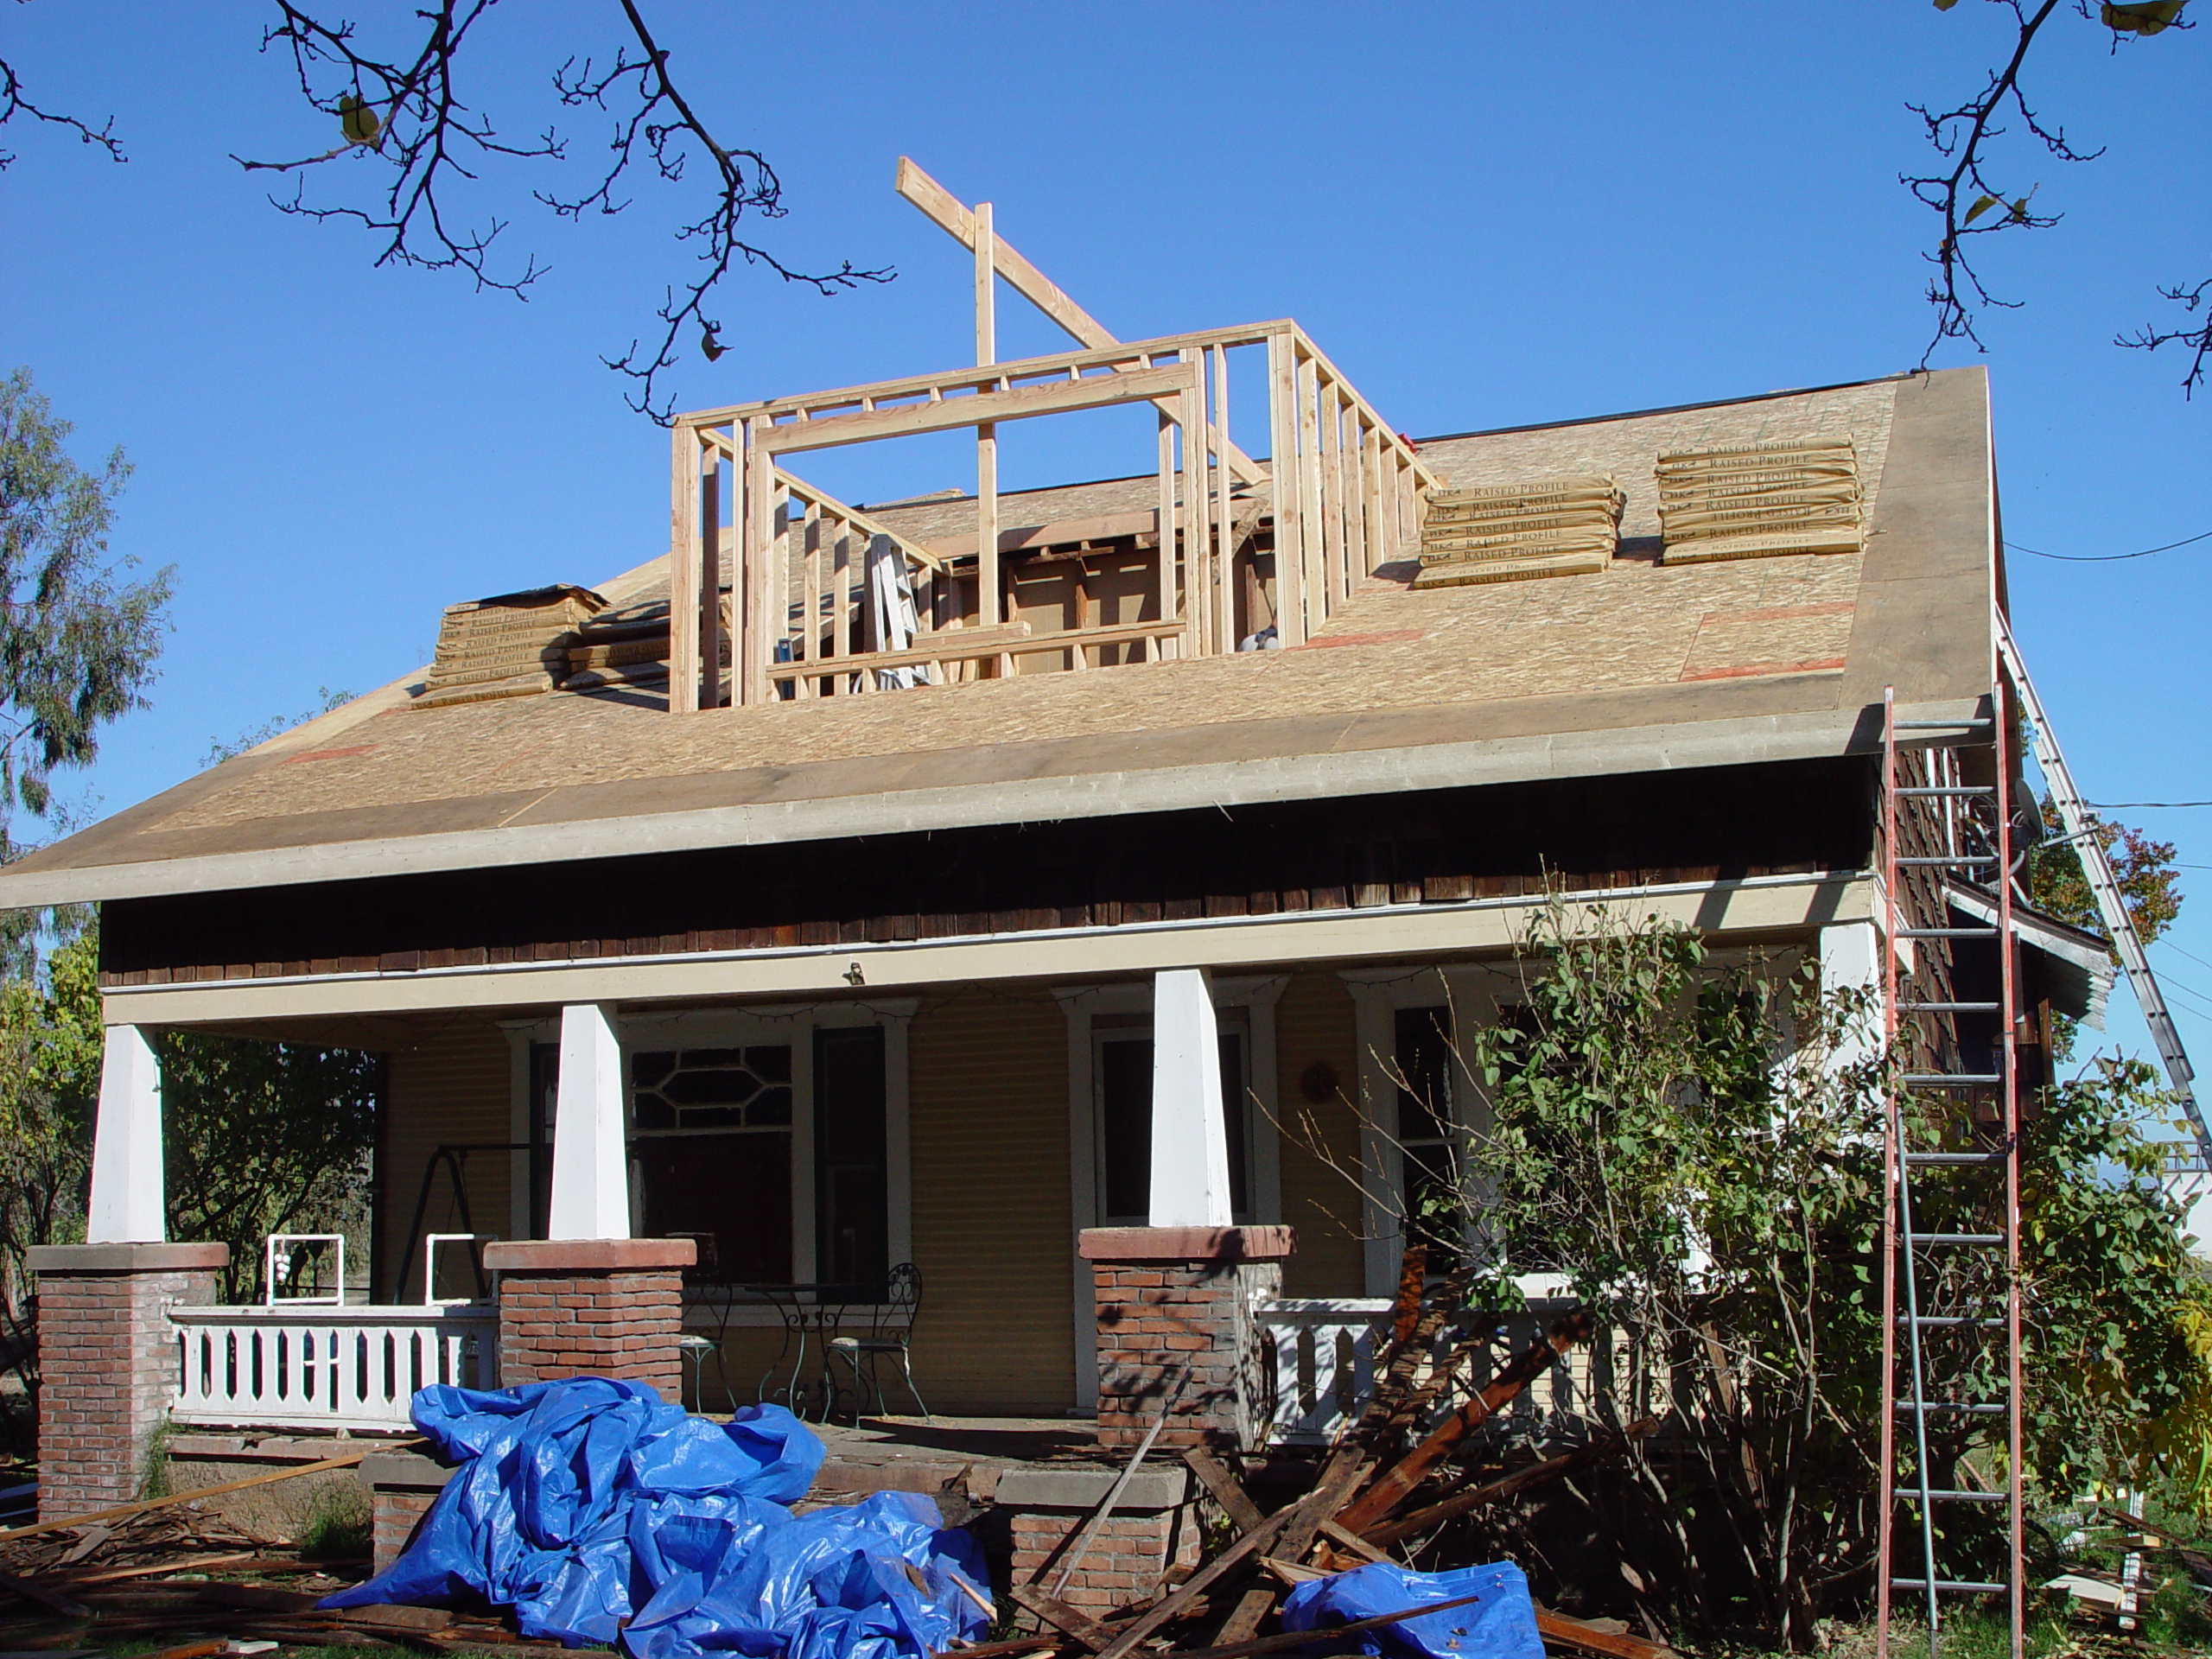
The homestead was in dire need of a new roof; and while we were at it, we decided to redo and expand the existing dormer, which at the current time was just attic space. So in October 2007, Brian with the assistance and oversight of his brother Clinton (owner of Berry Construction) began their endeavor.

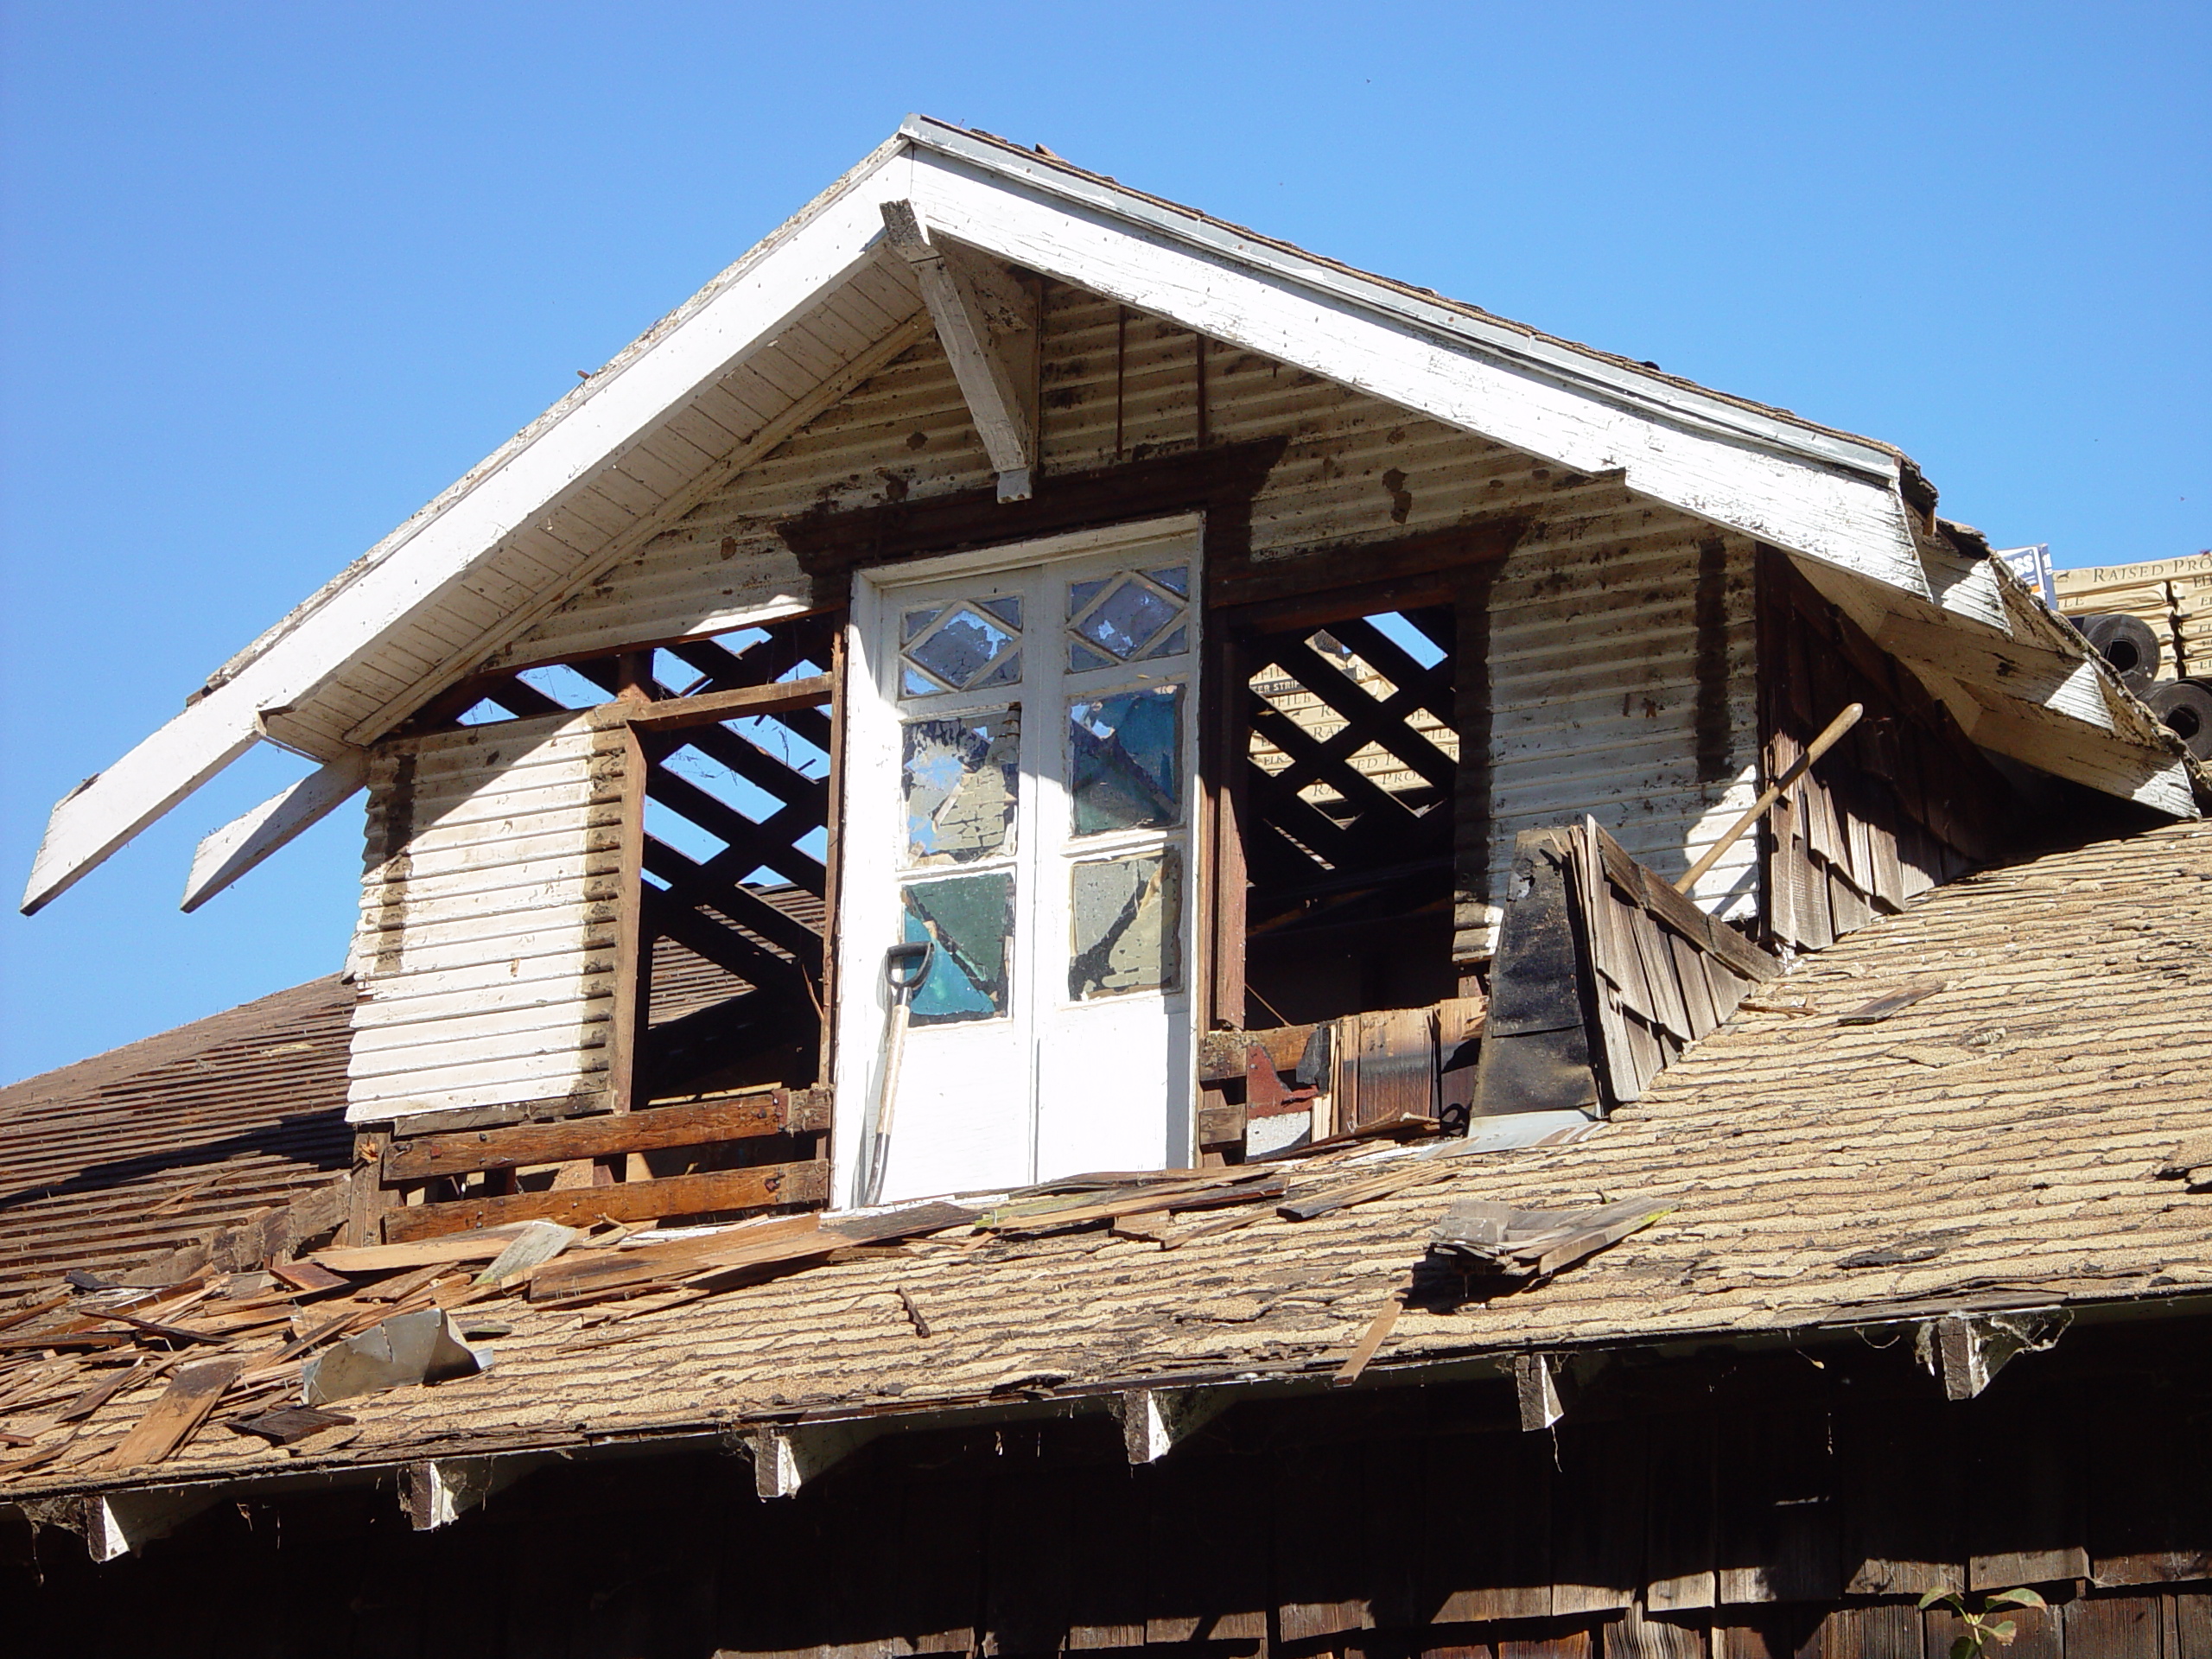
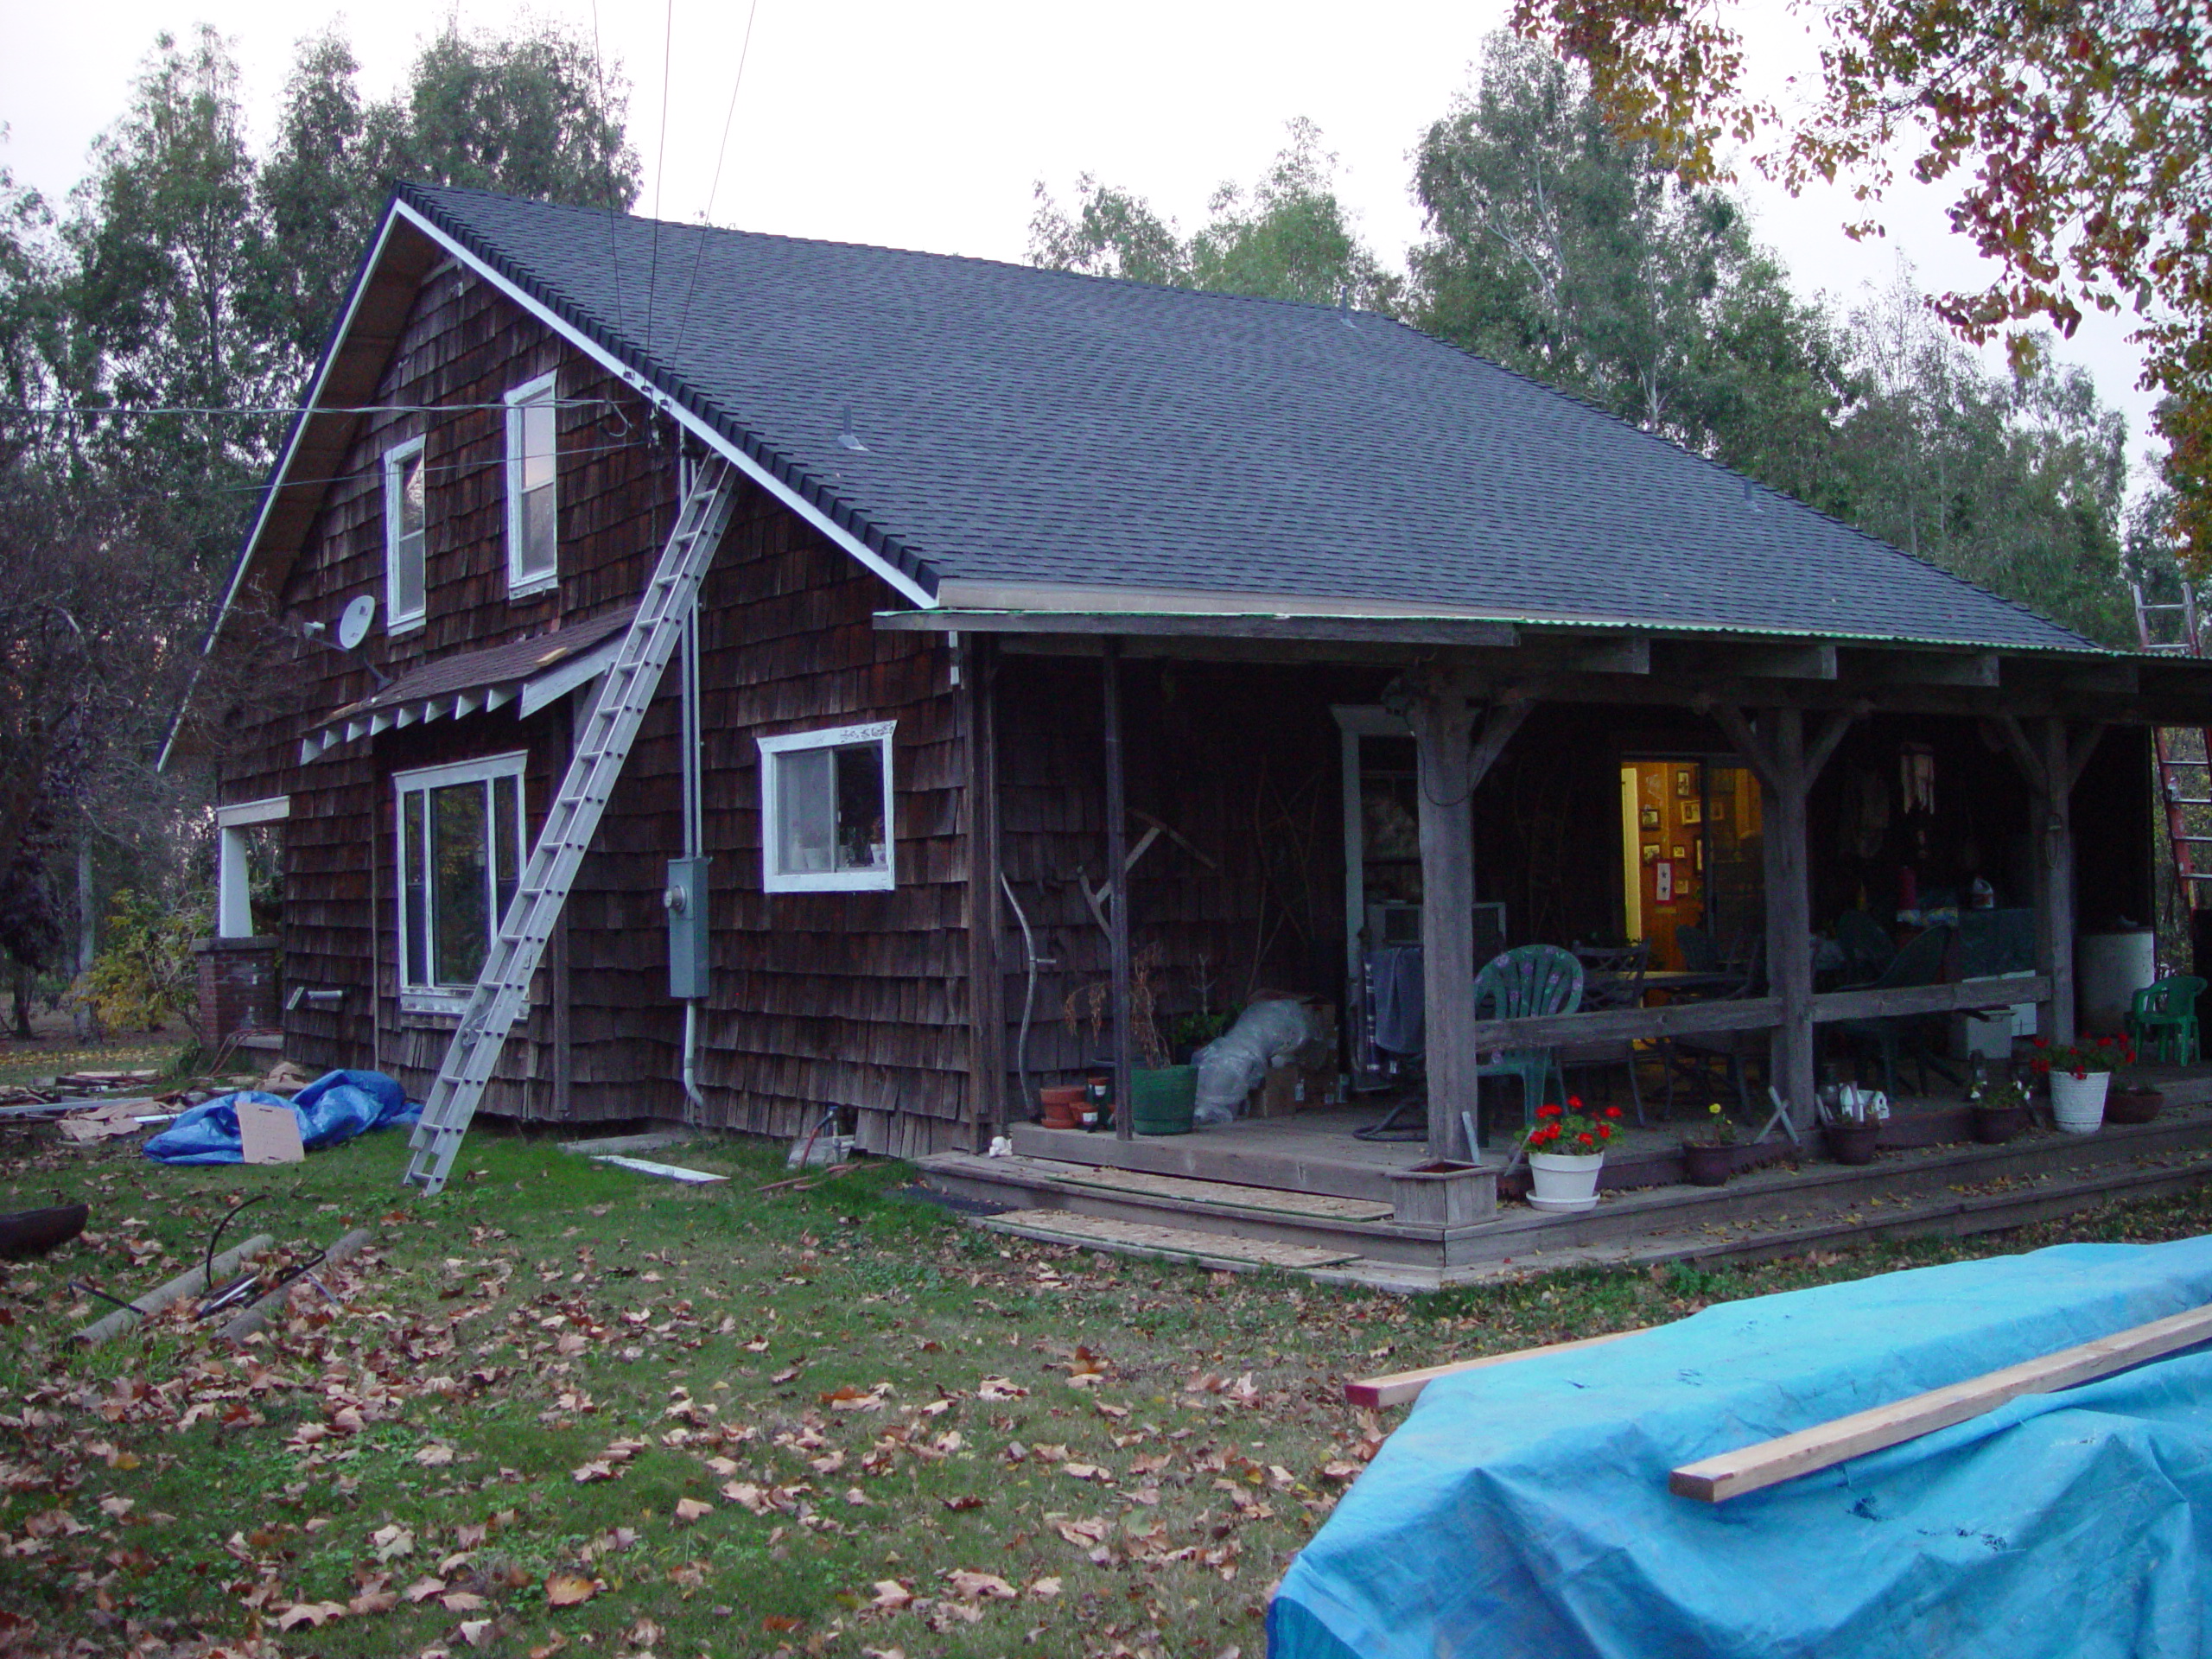
As seen in the following photograph, the roof was lacking a few shingles; and it’s hard to tell, but the “recessed dormer” doors had several broken panes and an unsafe small roof deck.

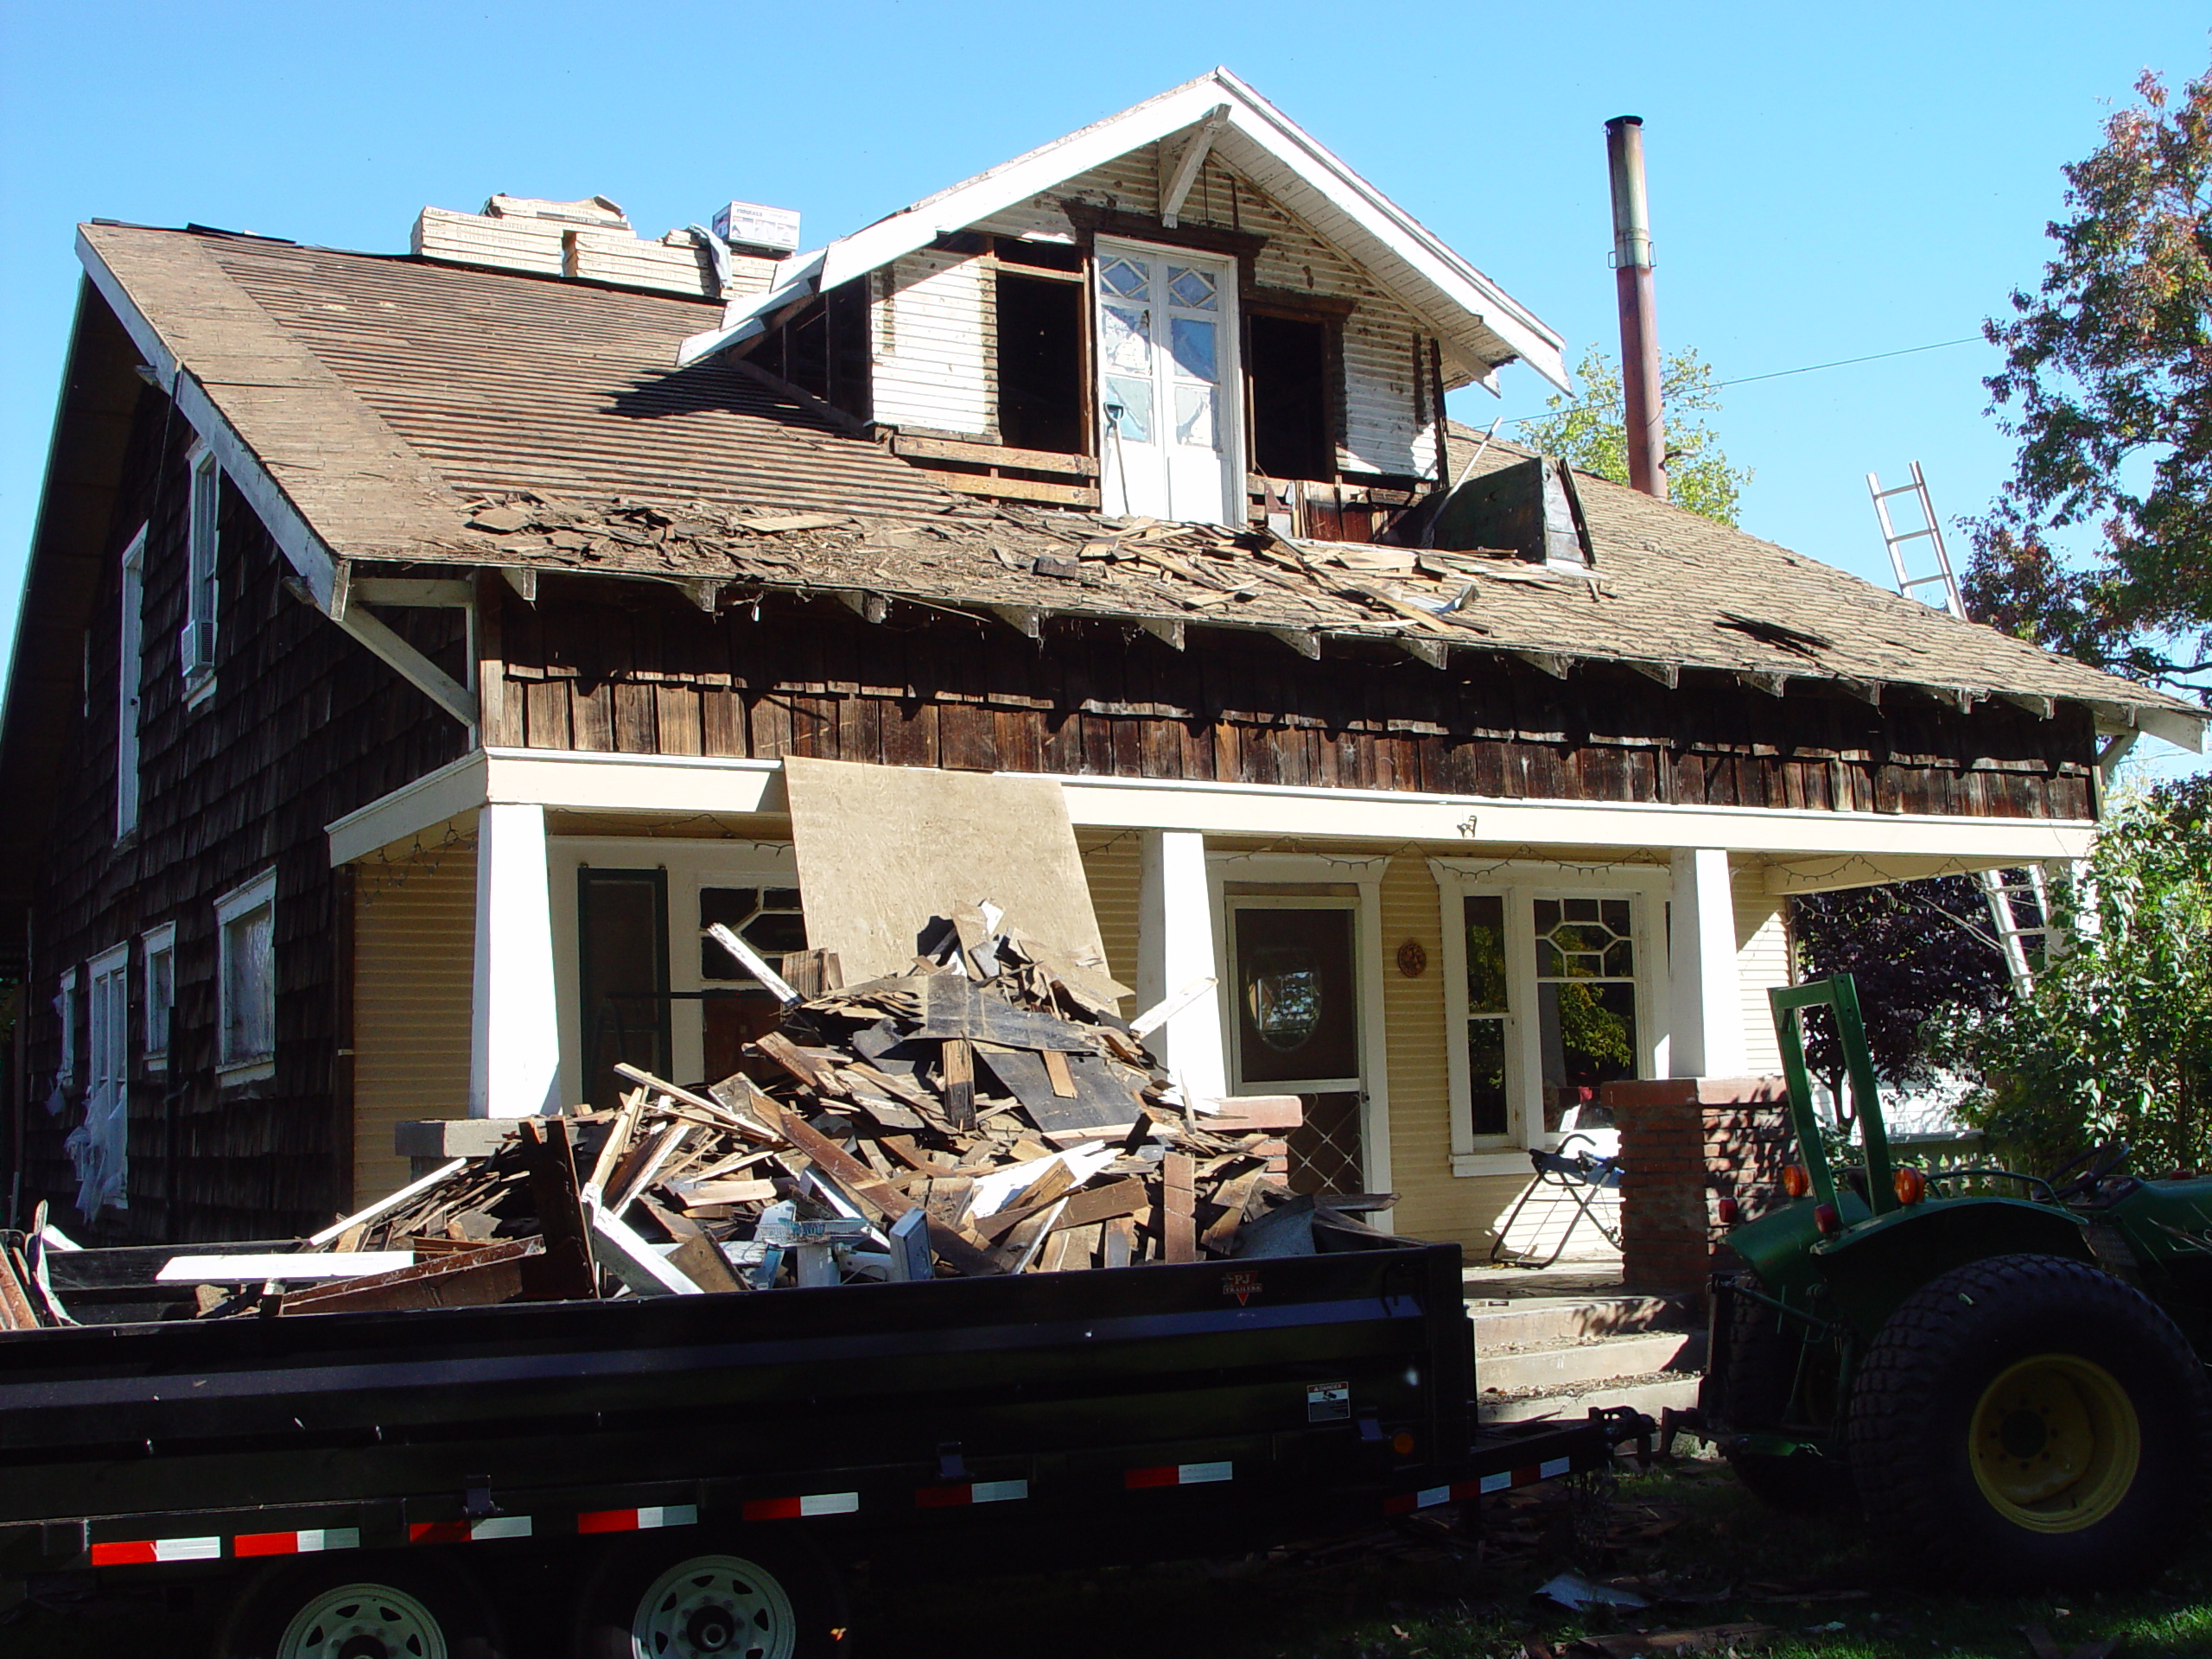
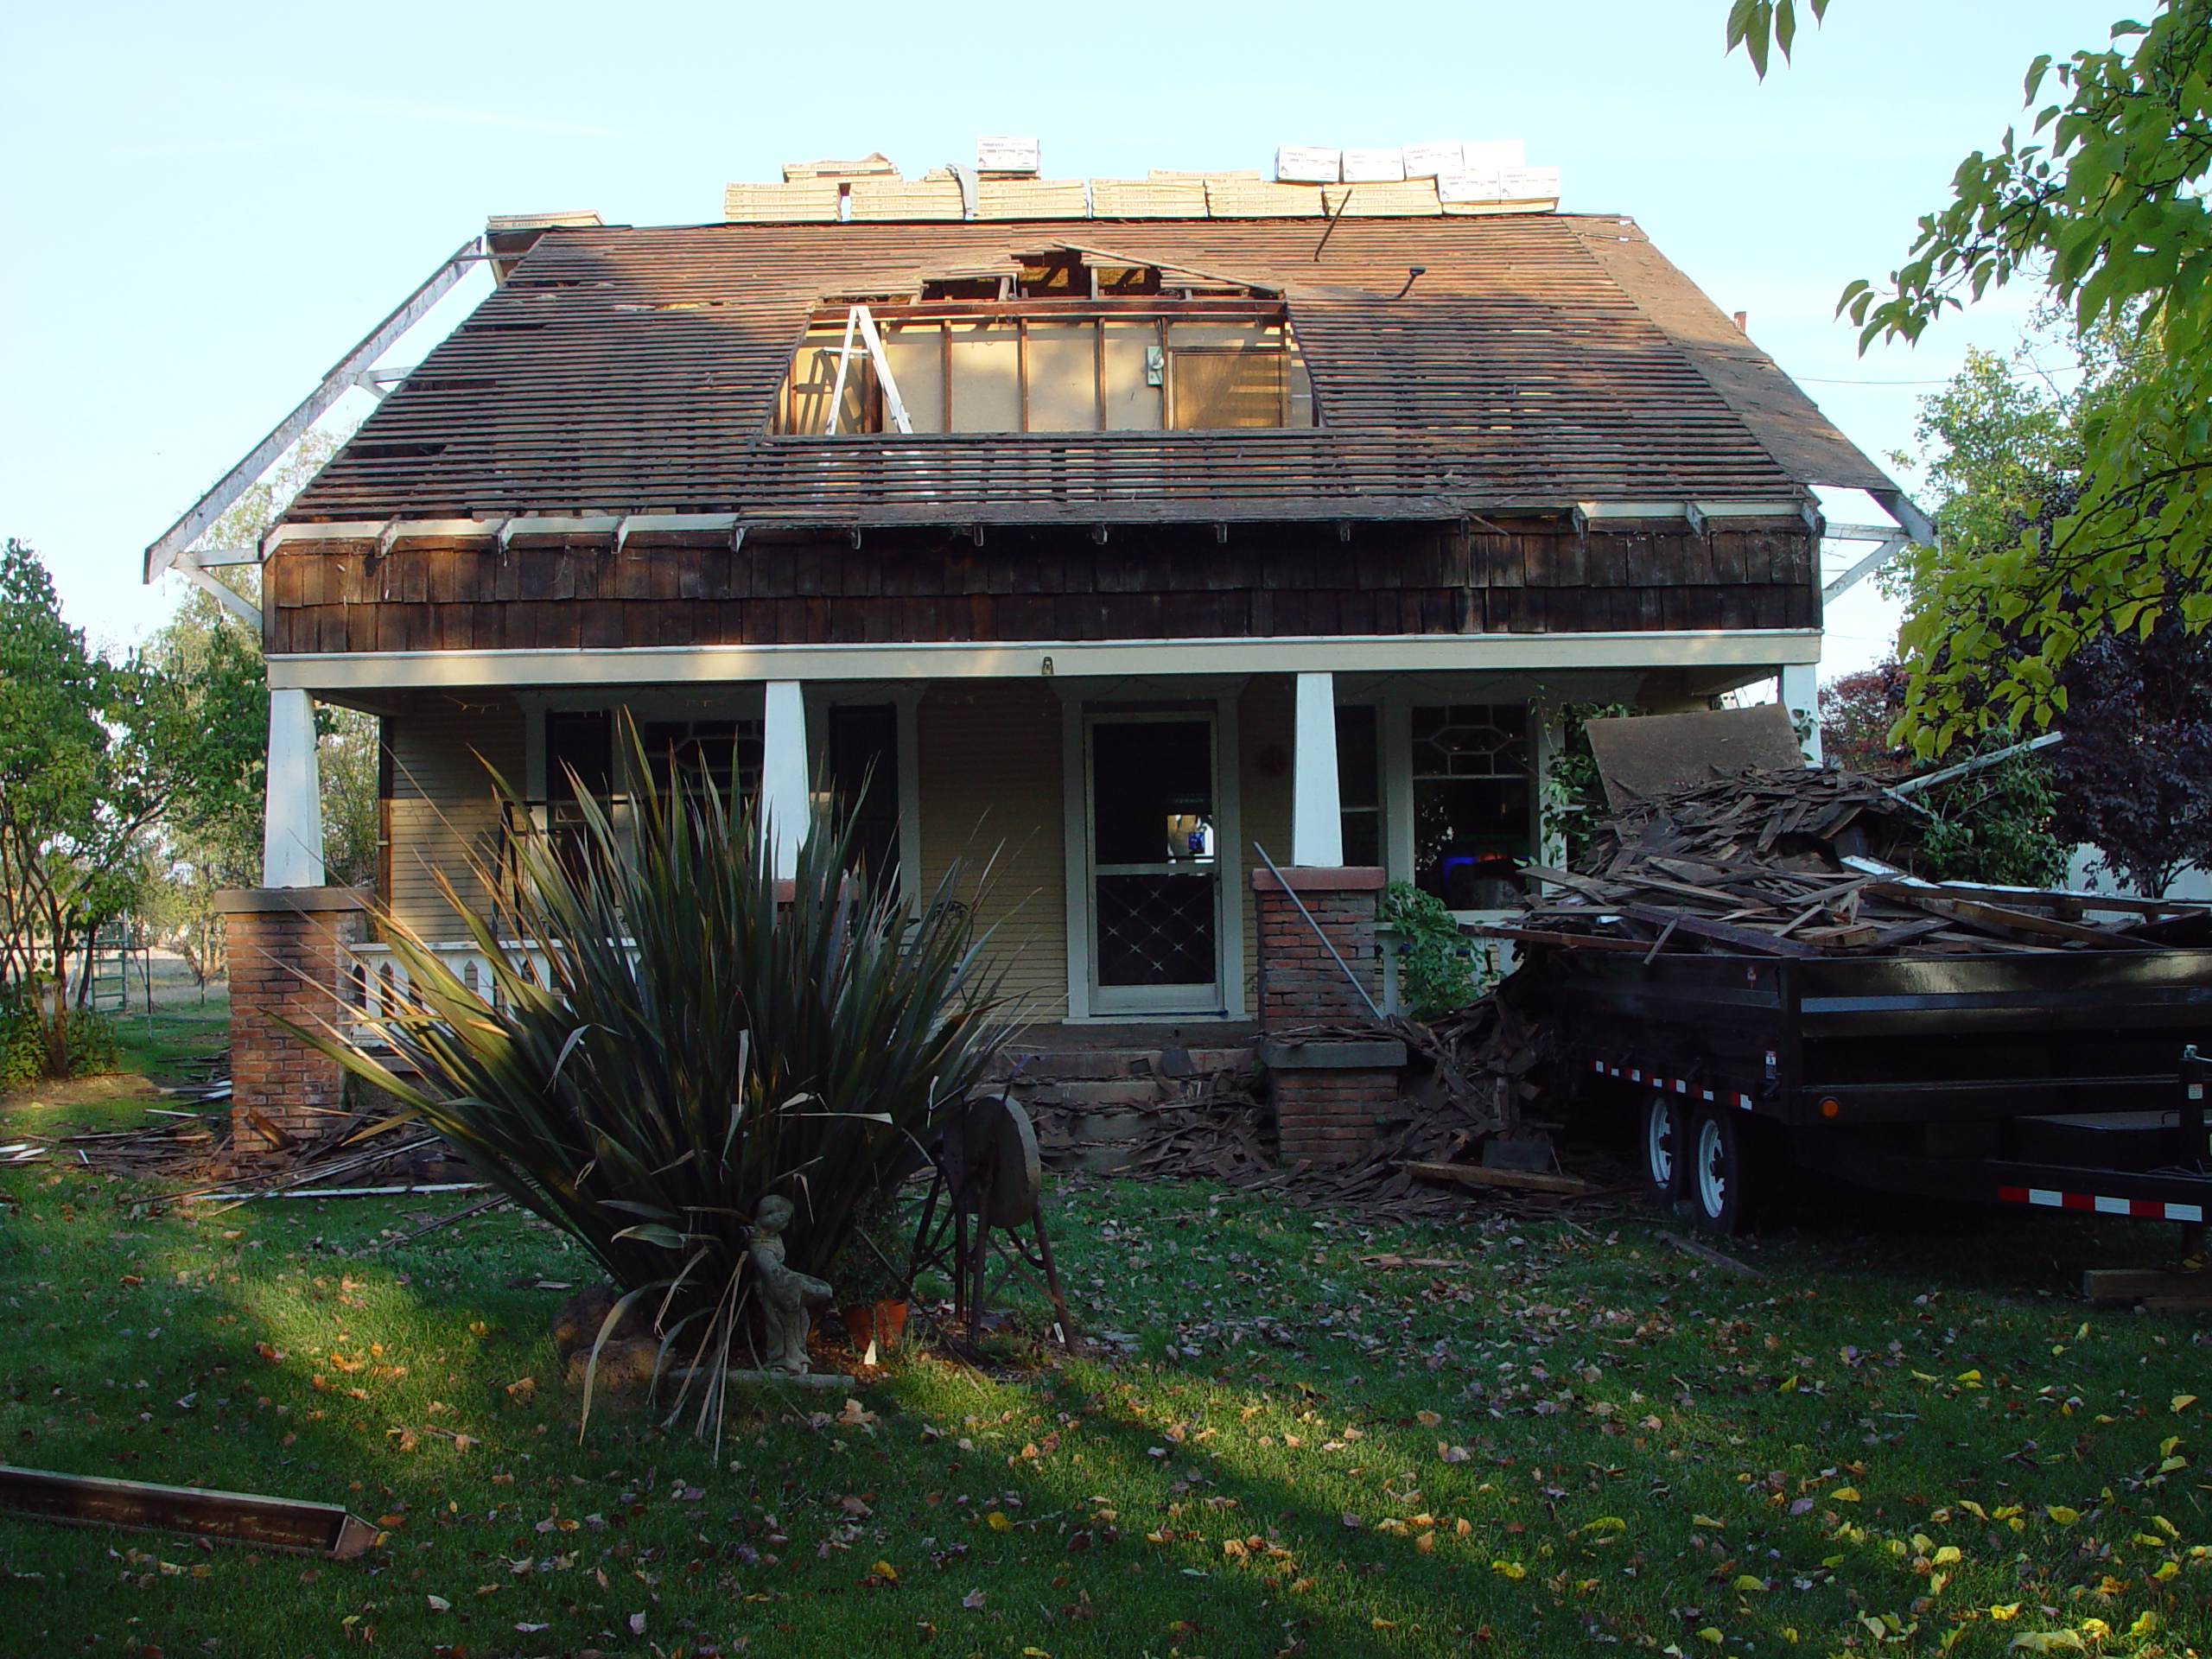
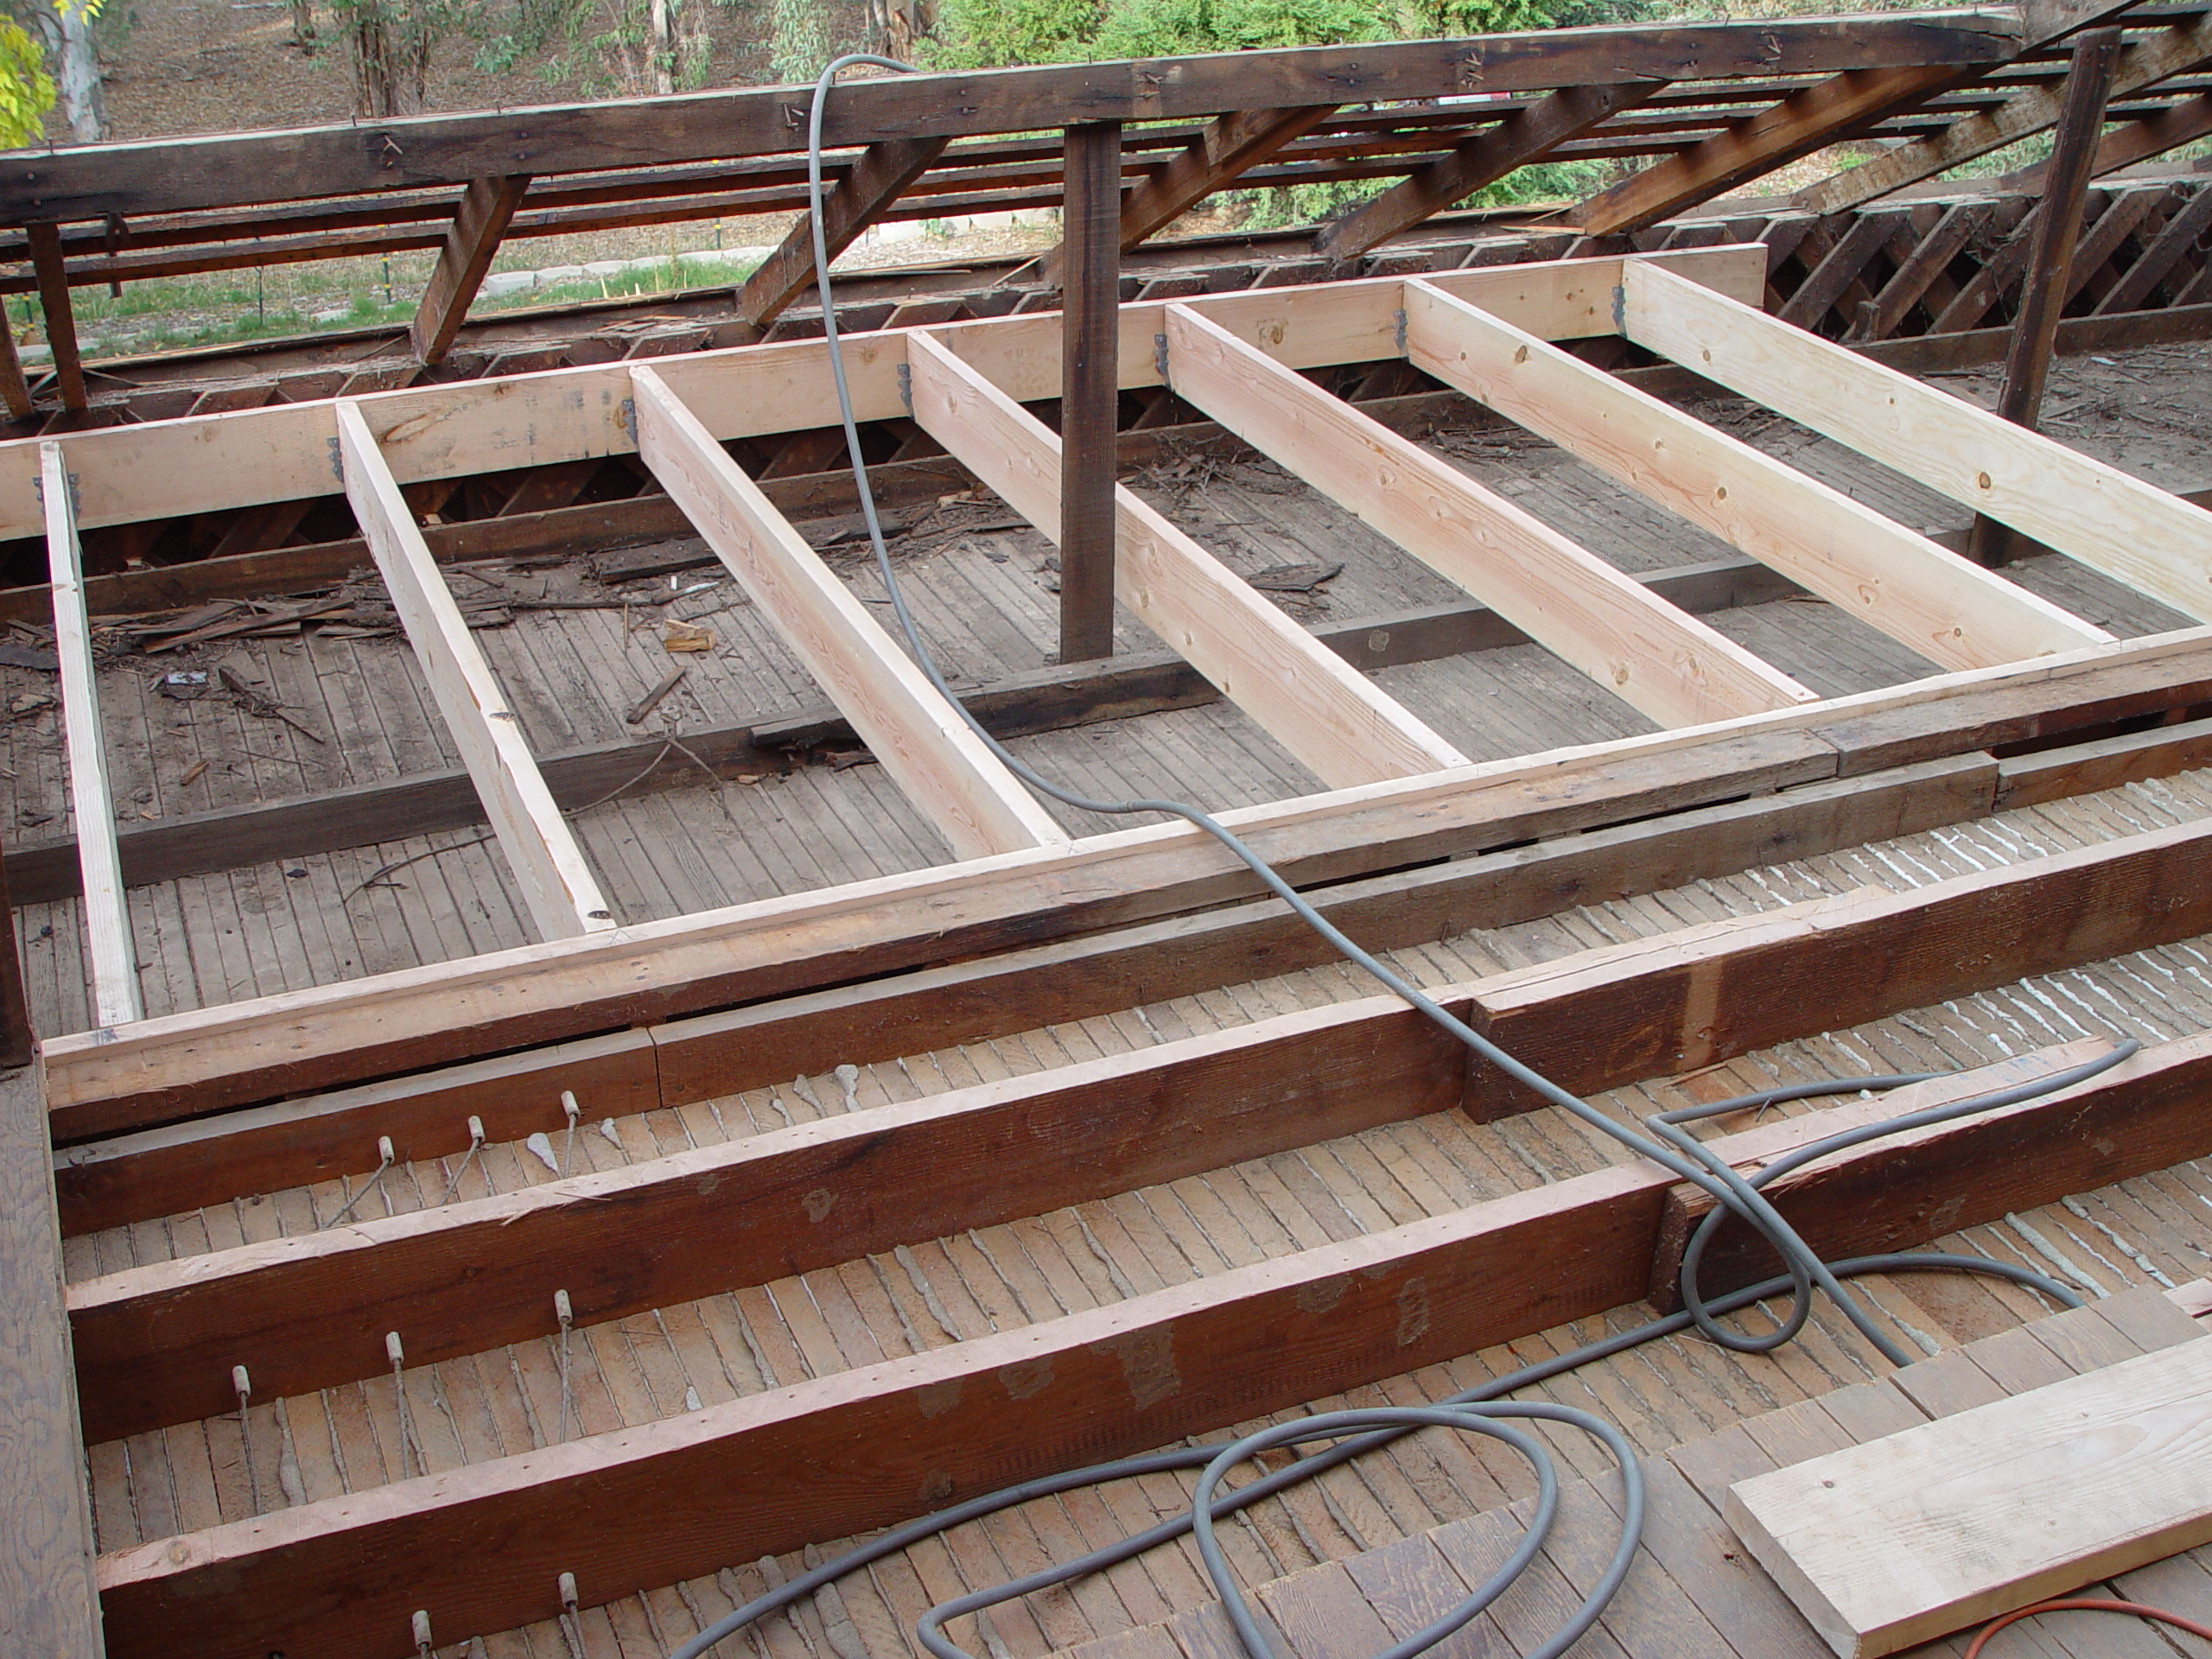
First, they removed at least two layers of shingles, tar paper, and the skip sheathing (commonly found on roofs that had shake shingles). In addition, restored all the eaves by removing the knee braces and completely replacing all the eaves and fascia.

One side of the roof was accomplished at a time due to potential inclement weather. As seen in the following photo, even the prudent had to implement tarps at times.

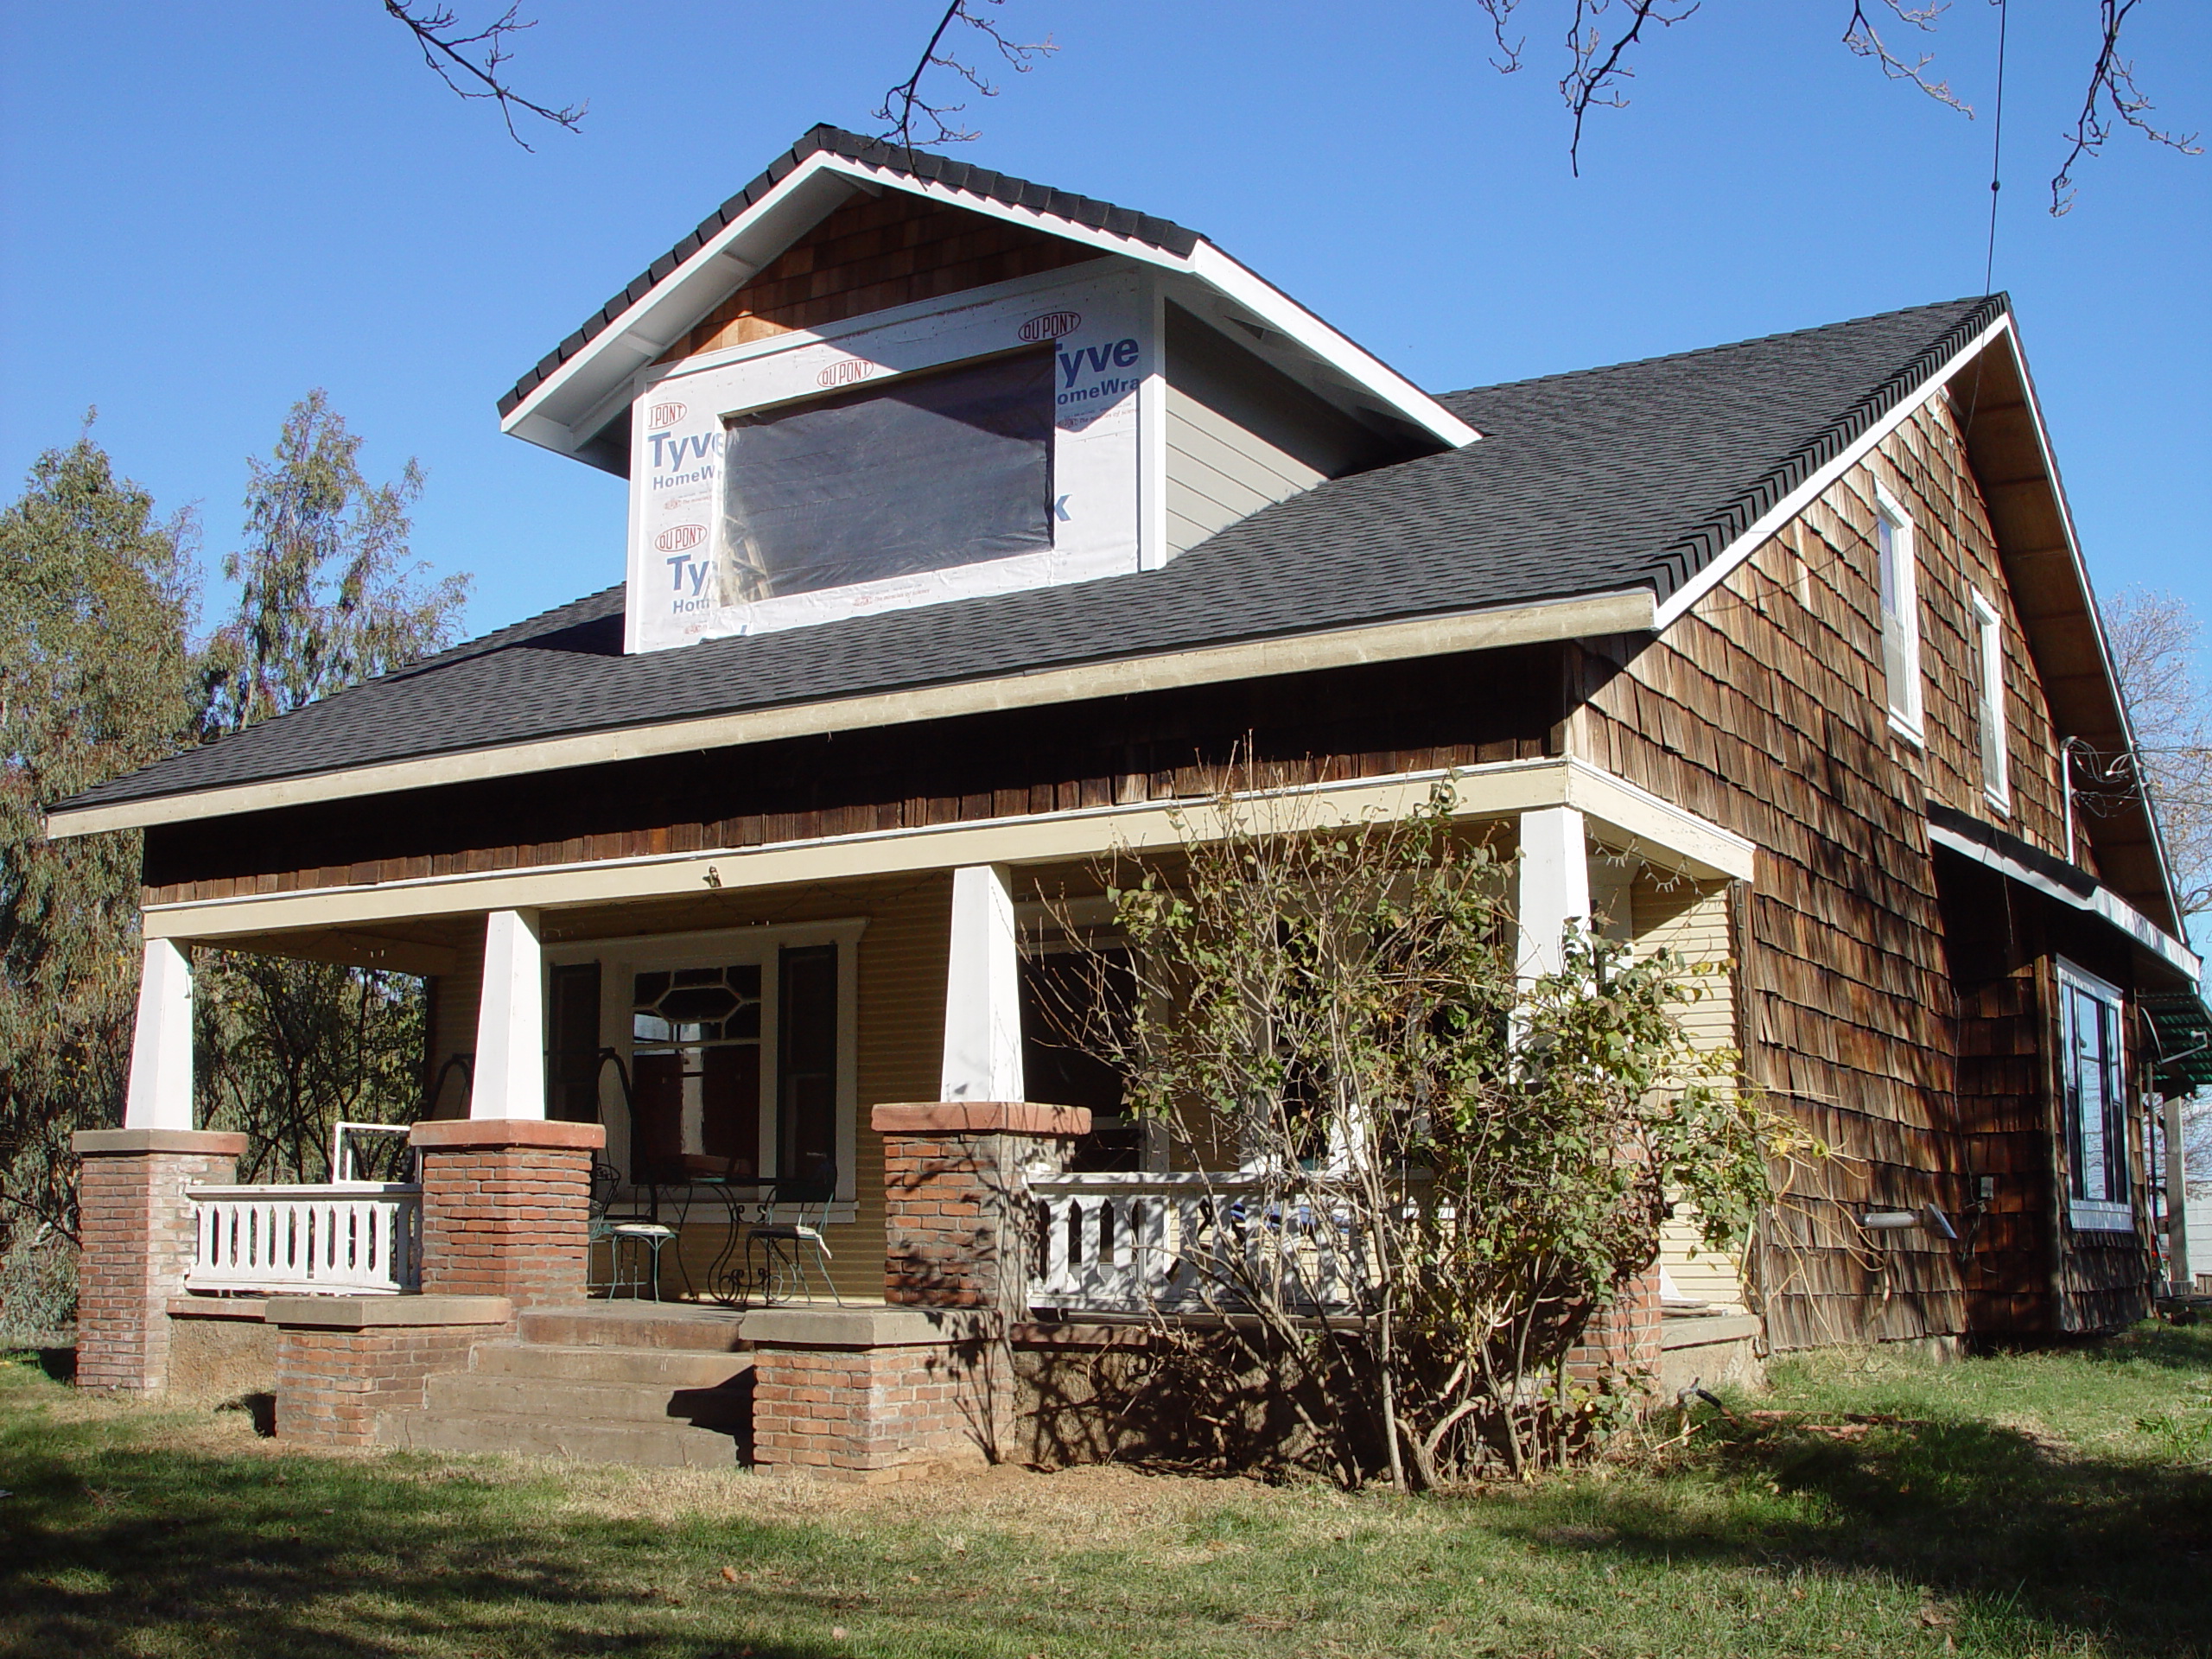
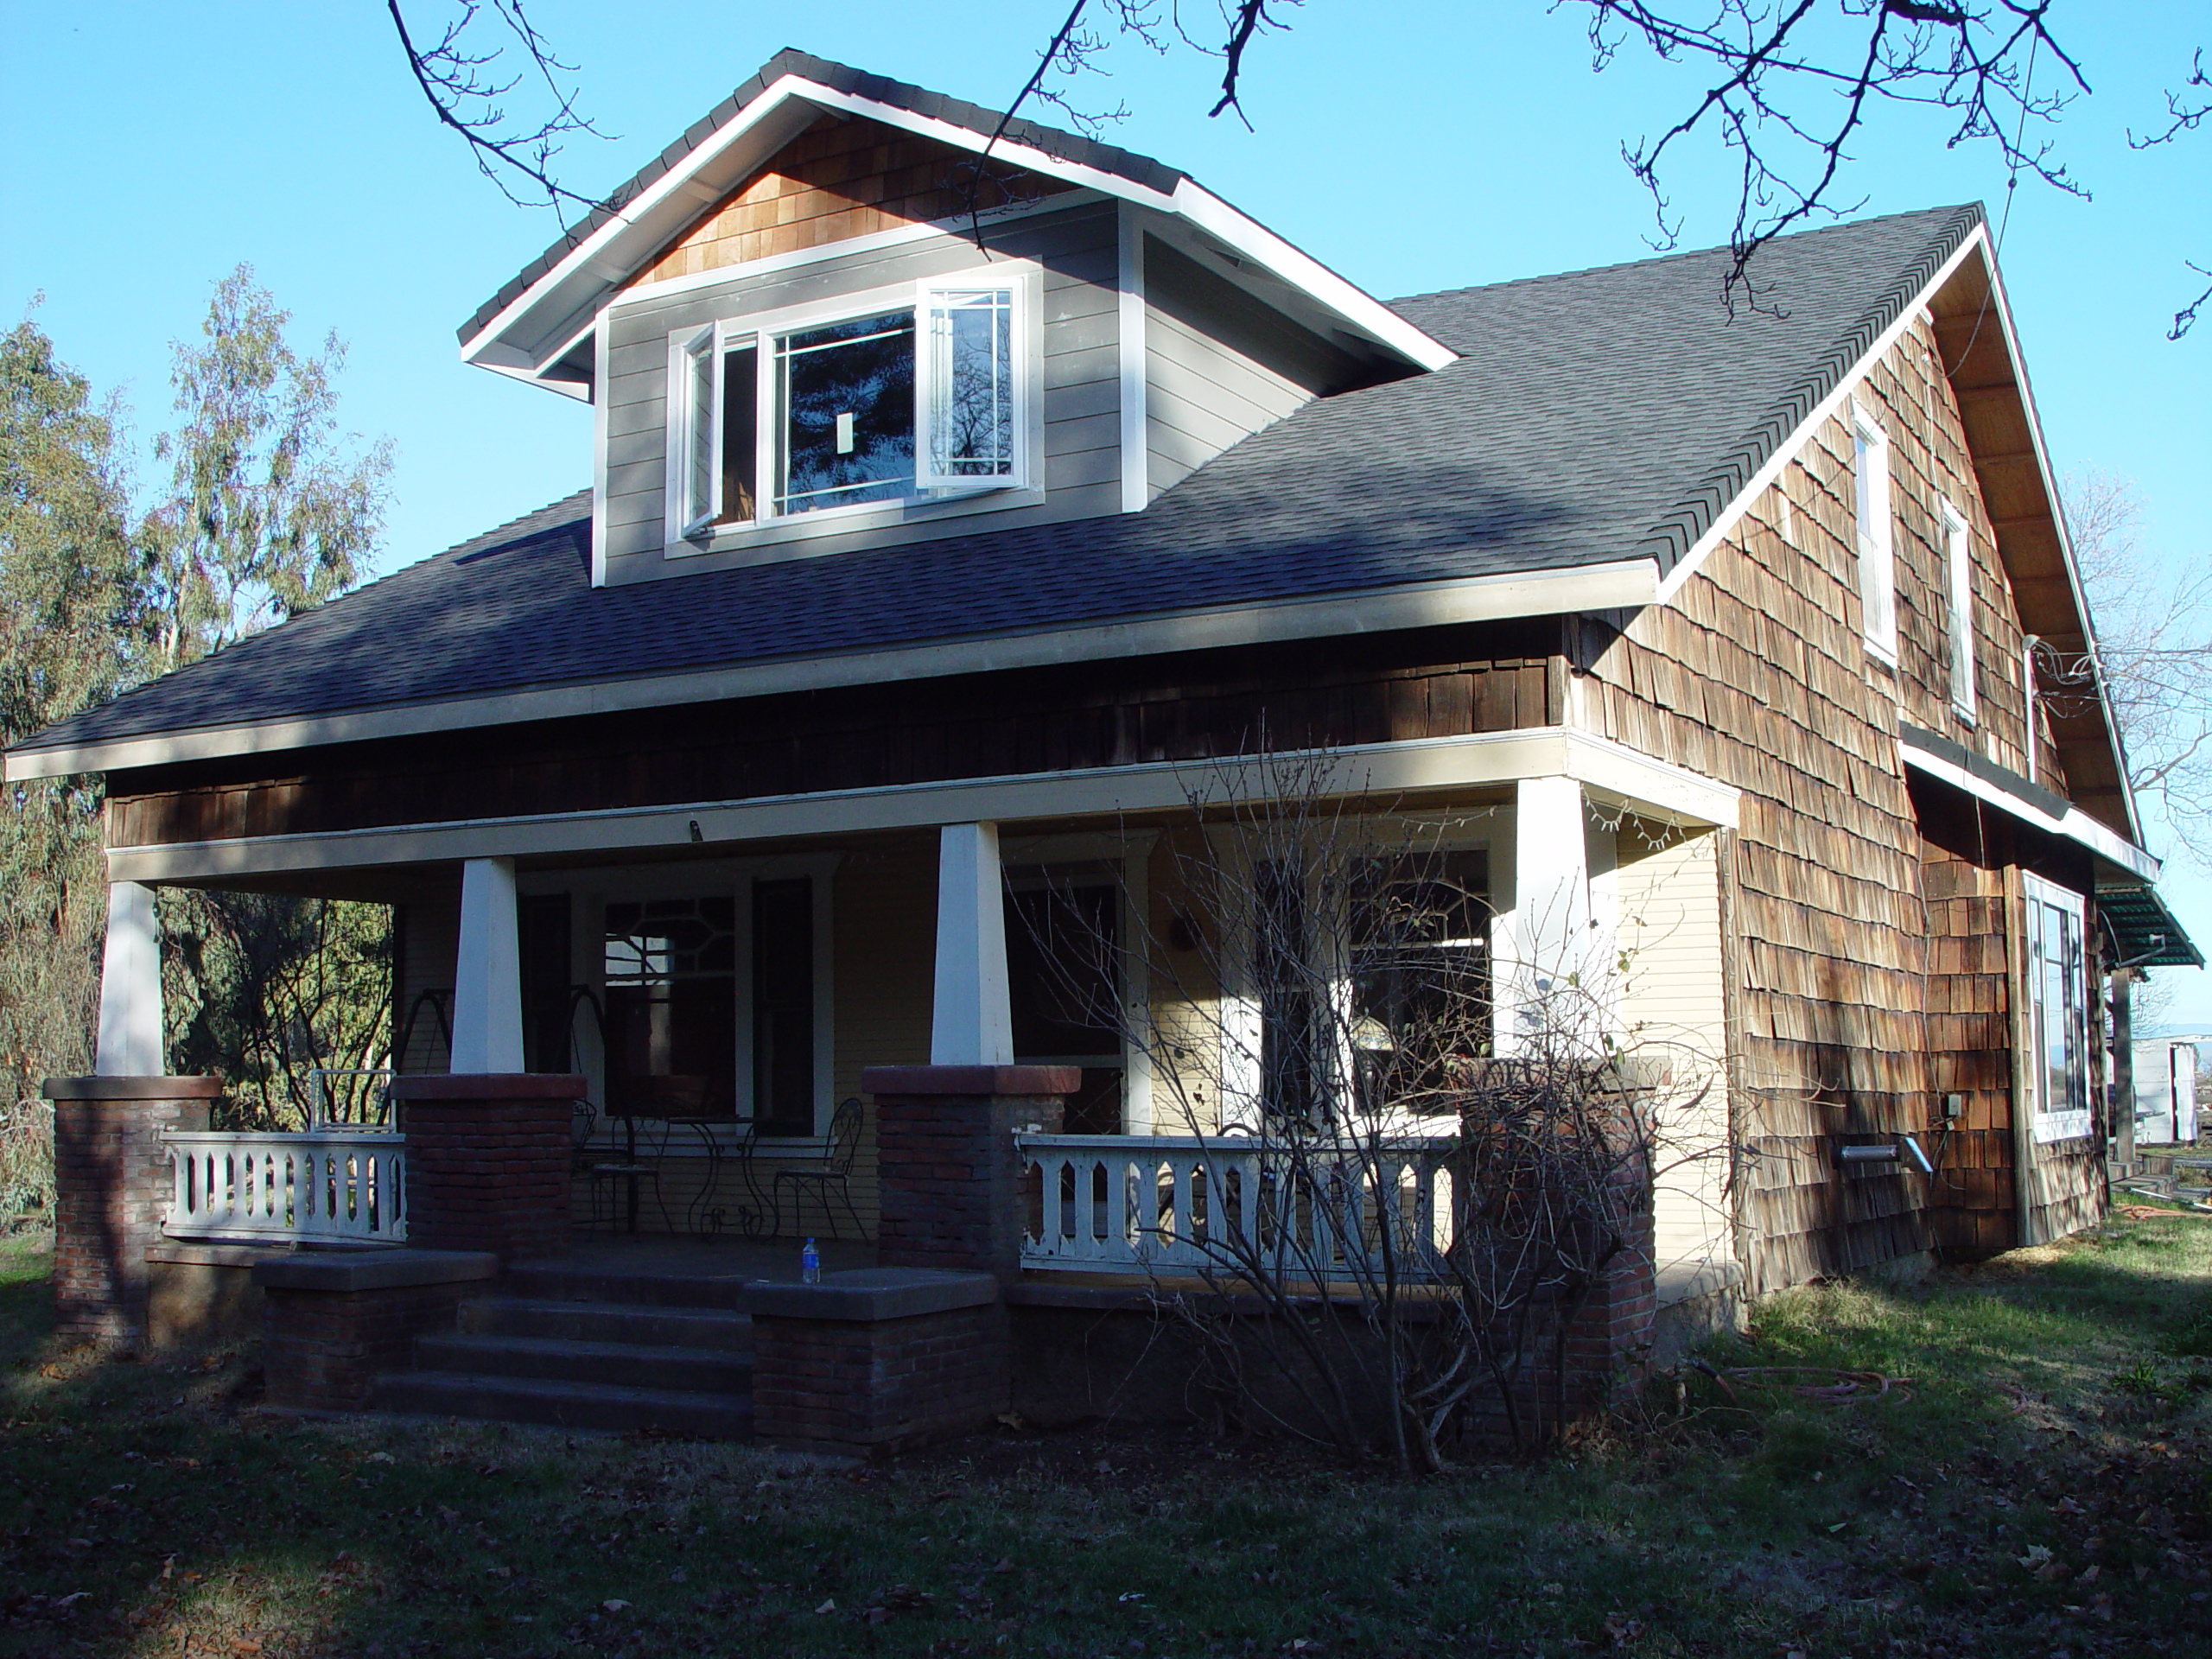
One of the most recognizable characteristics of the craftsman style are exposed roof rafters and rafter tails; we decided to add fascia (to protect the rafter tails) and leave the roof rafters “au naturel” with no soffits.

As you can see with the current pictures, we lost the craftsman charm by not replacing the knee braces; this is a future must.  We saved the old ones so we could use them as a template.

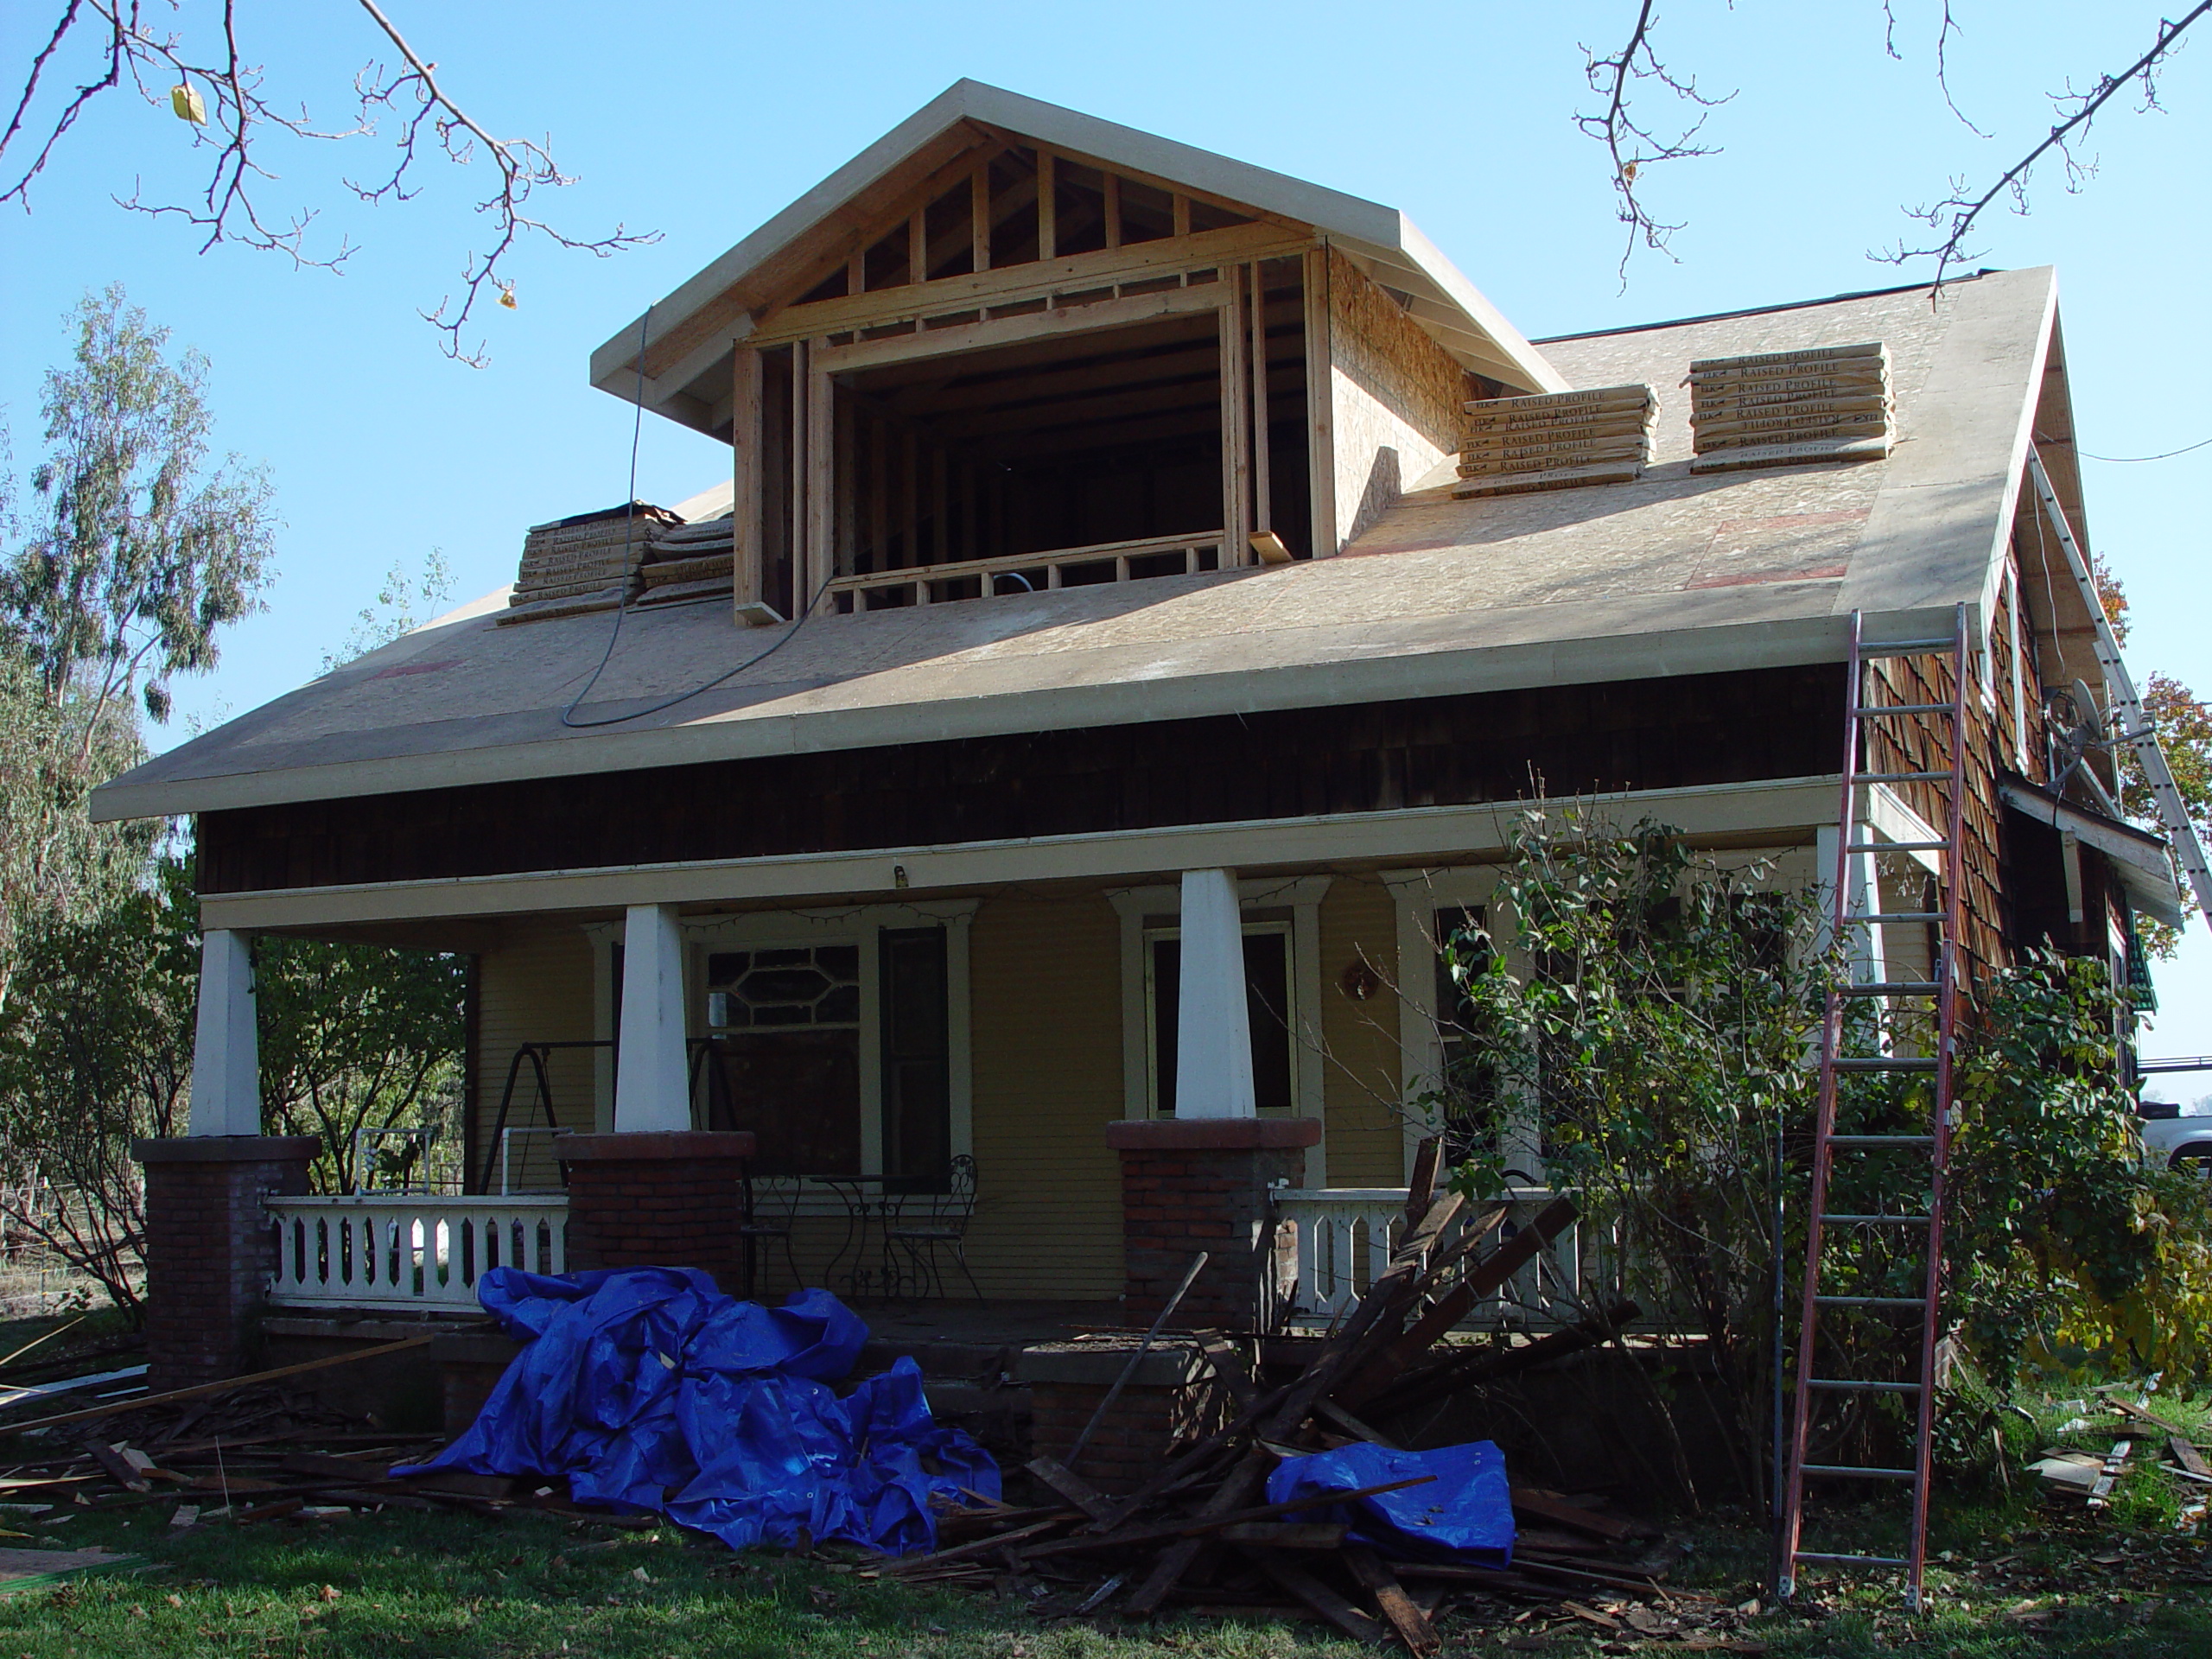
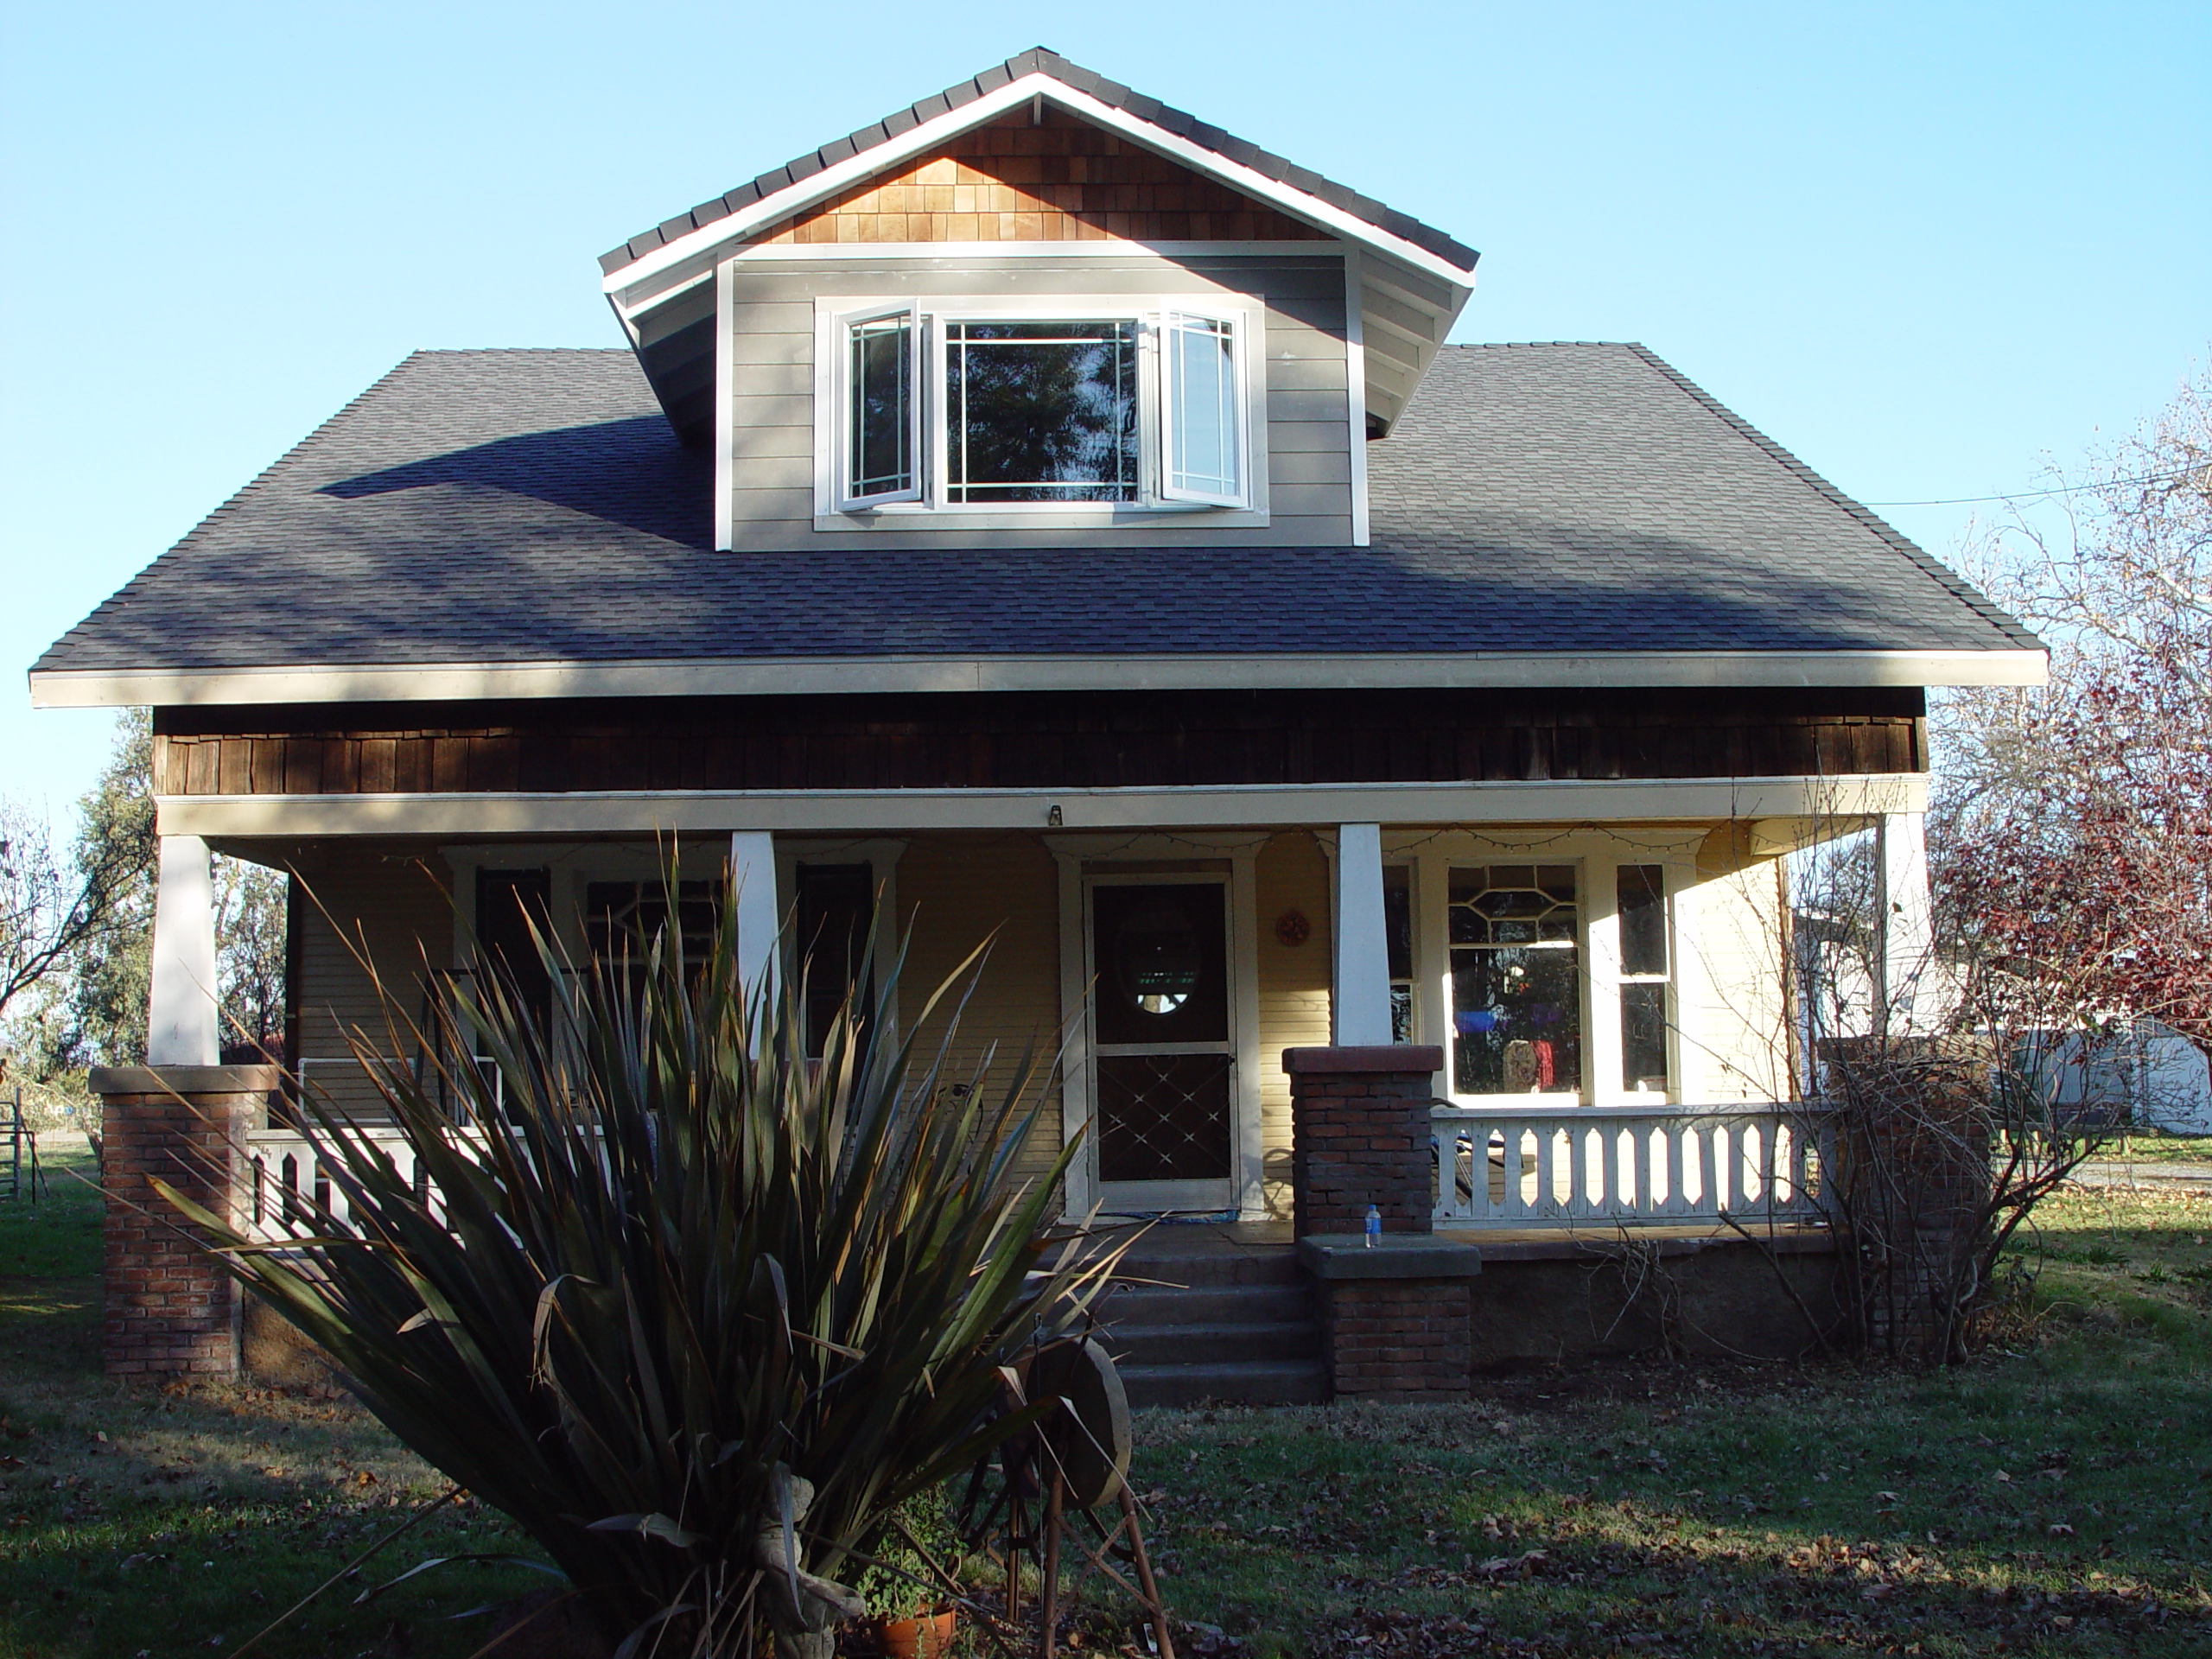
We made the decision to change the dormer from recessed to a “gable dormer”, which added space to the upstairs.  Our plans are to move the master bedroom from downstairs to upstairs; converting it into a master bedroom suite.

I almost forgot about the “bay” roof of the formal dining room.

The final product!

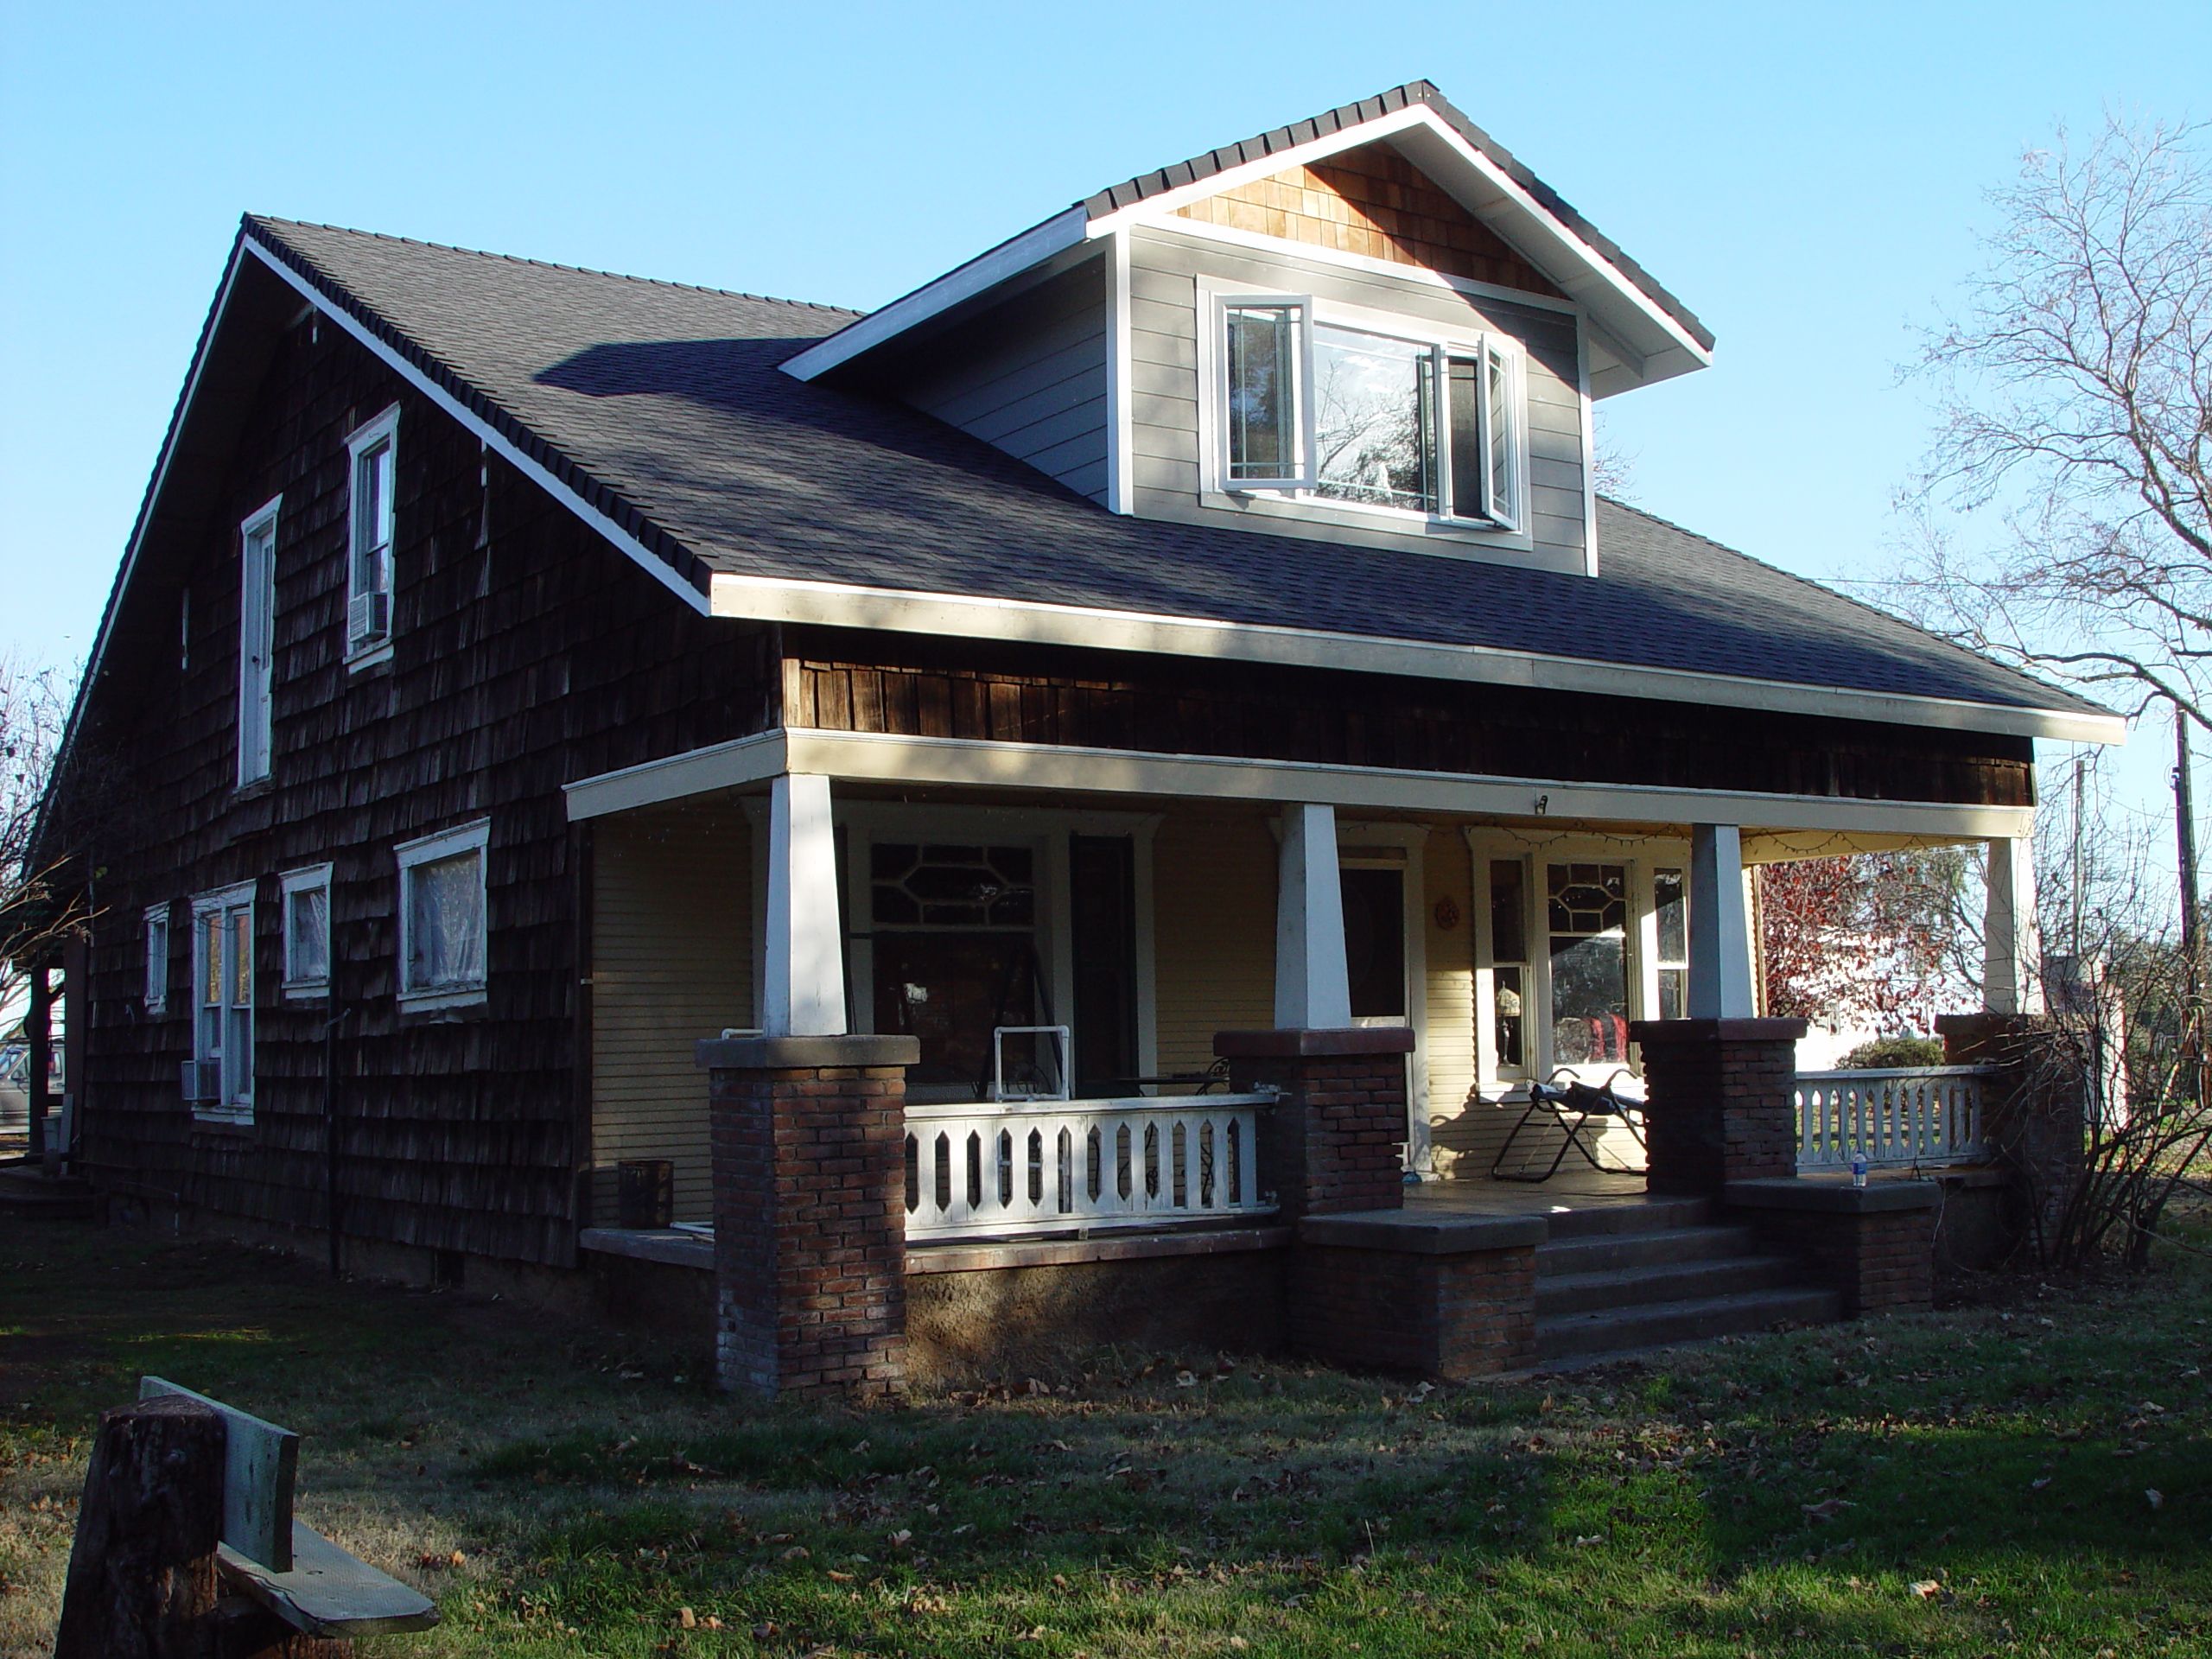
Also take note they removed the chimney from an old 55-gallon drum wood-burning stove.  The wood-burning stove was replaced back in the mid 90s with a pellet stove; and hence, the chimney with an unobtrusive sidewall horizontal vent.

It’s been over 6 years since the “New Roof, New Dormer” … so unfortunately, I’m unable to provide a detailed list of materials.  Some of the materials include:   asphalt shingles (black), plywood, felt, roofing nails, flashing.  The cost was approximately $15,000.

Lazy B Retaining Wall

Approximately a decade ago (November/December 2002 to be exact), Brian and I developed a fascination for a particular conifer while visiting family in Chico, CA.  After a bit of sleuthing, we discovered the conifers were in fact Redwoods.  In fact a hybrid of the Sequoiadendron giganteum; the world’s largest trees (by volume).  These hybrids have a better chance of survival in the hot Sacramento Valley.  With visions of Redwoods dancing in our heads and a corner of unkempt land in the front yard of the Lazy B, we set out to establish our very first Redwood grove (as seen in the following picture).

However, the location required a bit of landscaping and of course a retaining wall to keep the dirt from inevitable erosion.  We actually had some dirt brought in before planting our trees.

Supplies required: tractor, shovel, pickaxe, level, mallet, chisel, string line, gravel, 3″ perforated drain pipe wrapped in fabric and last but not least retaining wall block. These concrete blocks interlock and require no mortar; and are best for low level walls.

I will provide you a brief rundown of what we did, but the Lowe’s website explains it best!

I cannot stress this enough, but the key to successful retaining wall construction is a level foundation of blocks. The foundation course must be below-ground level so that the soil will hold it firmly in place.  To accomplish this a layer of gravel is put down, and each retaining wall block is laid and leveled one by one (unless you’re lucky enough to have a crew). During this process use of a level and a string line are essential.  Once this first course is completed, the remaining courses of block should be laid with the greatest of ease (if you’re strong like bull)!

You are unable to see it, but we backfilled the wall with gravel and the perforated drain pipe (at a slight angle) to aide in proper drainage. Grading the area above also serves to help keep the water away.

The fruitless mulberry tree roots were a bit intrusive and the use of a pickaxe was a must.

Nothing (but the roots) got in our way … we continued on into the night!  We persevered and all was a success!

The Lazy B retaining wall … not too shabby for a couple of amateurs!

One may ask, “What about those gaps in the retaining wall?”  I don’t know that the gaps at the bottom are necessary, but that’s where the drainage pipes end.  This is something you may want to research if you plan on installing your own wall.

TinaJanuary 2, 2014 - 12:41 am

You guys are doing a fantastic job so far. I can’t wait to see the next project. However, I am afraid of showing the spouse as I suspect there will be delusions of grandeur floating through somebody’s head!

adminJune 13, 2014 - 2:25 pm

Why thank you Tina! Sorry it’s taken me “forever” to respond. I’ll be posting more shortly with all our upgrades and additions. We have visions of grandeur too, but they are slowly coming to fruition; you two will have to come out sometime and check it out.